BillPro now has a customer order portal. The checkout and order management flow in BillPro changes to use the order portal.
For a full overview of the order portal, see Order portal overview.
Order portal functionality
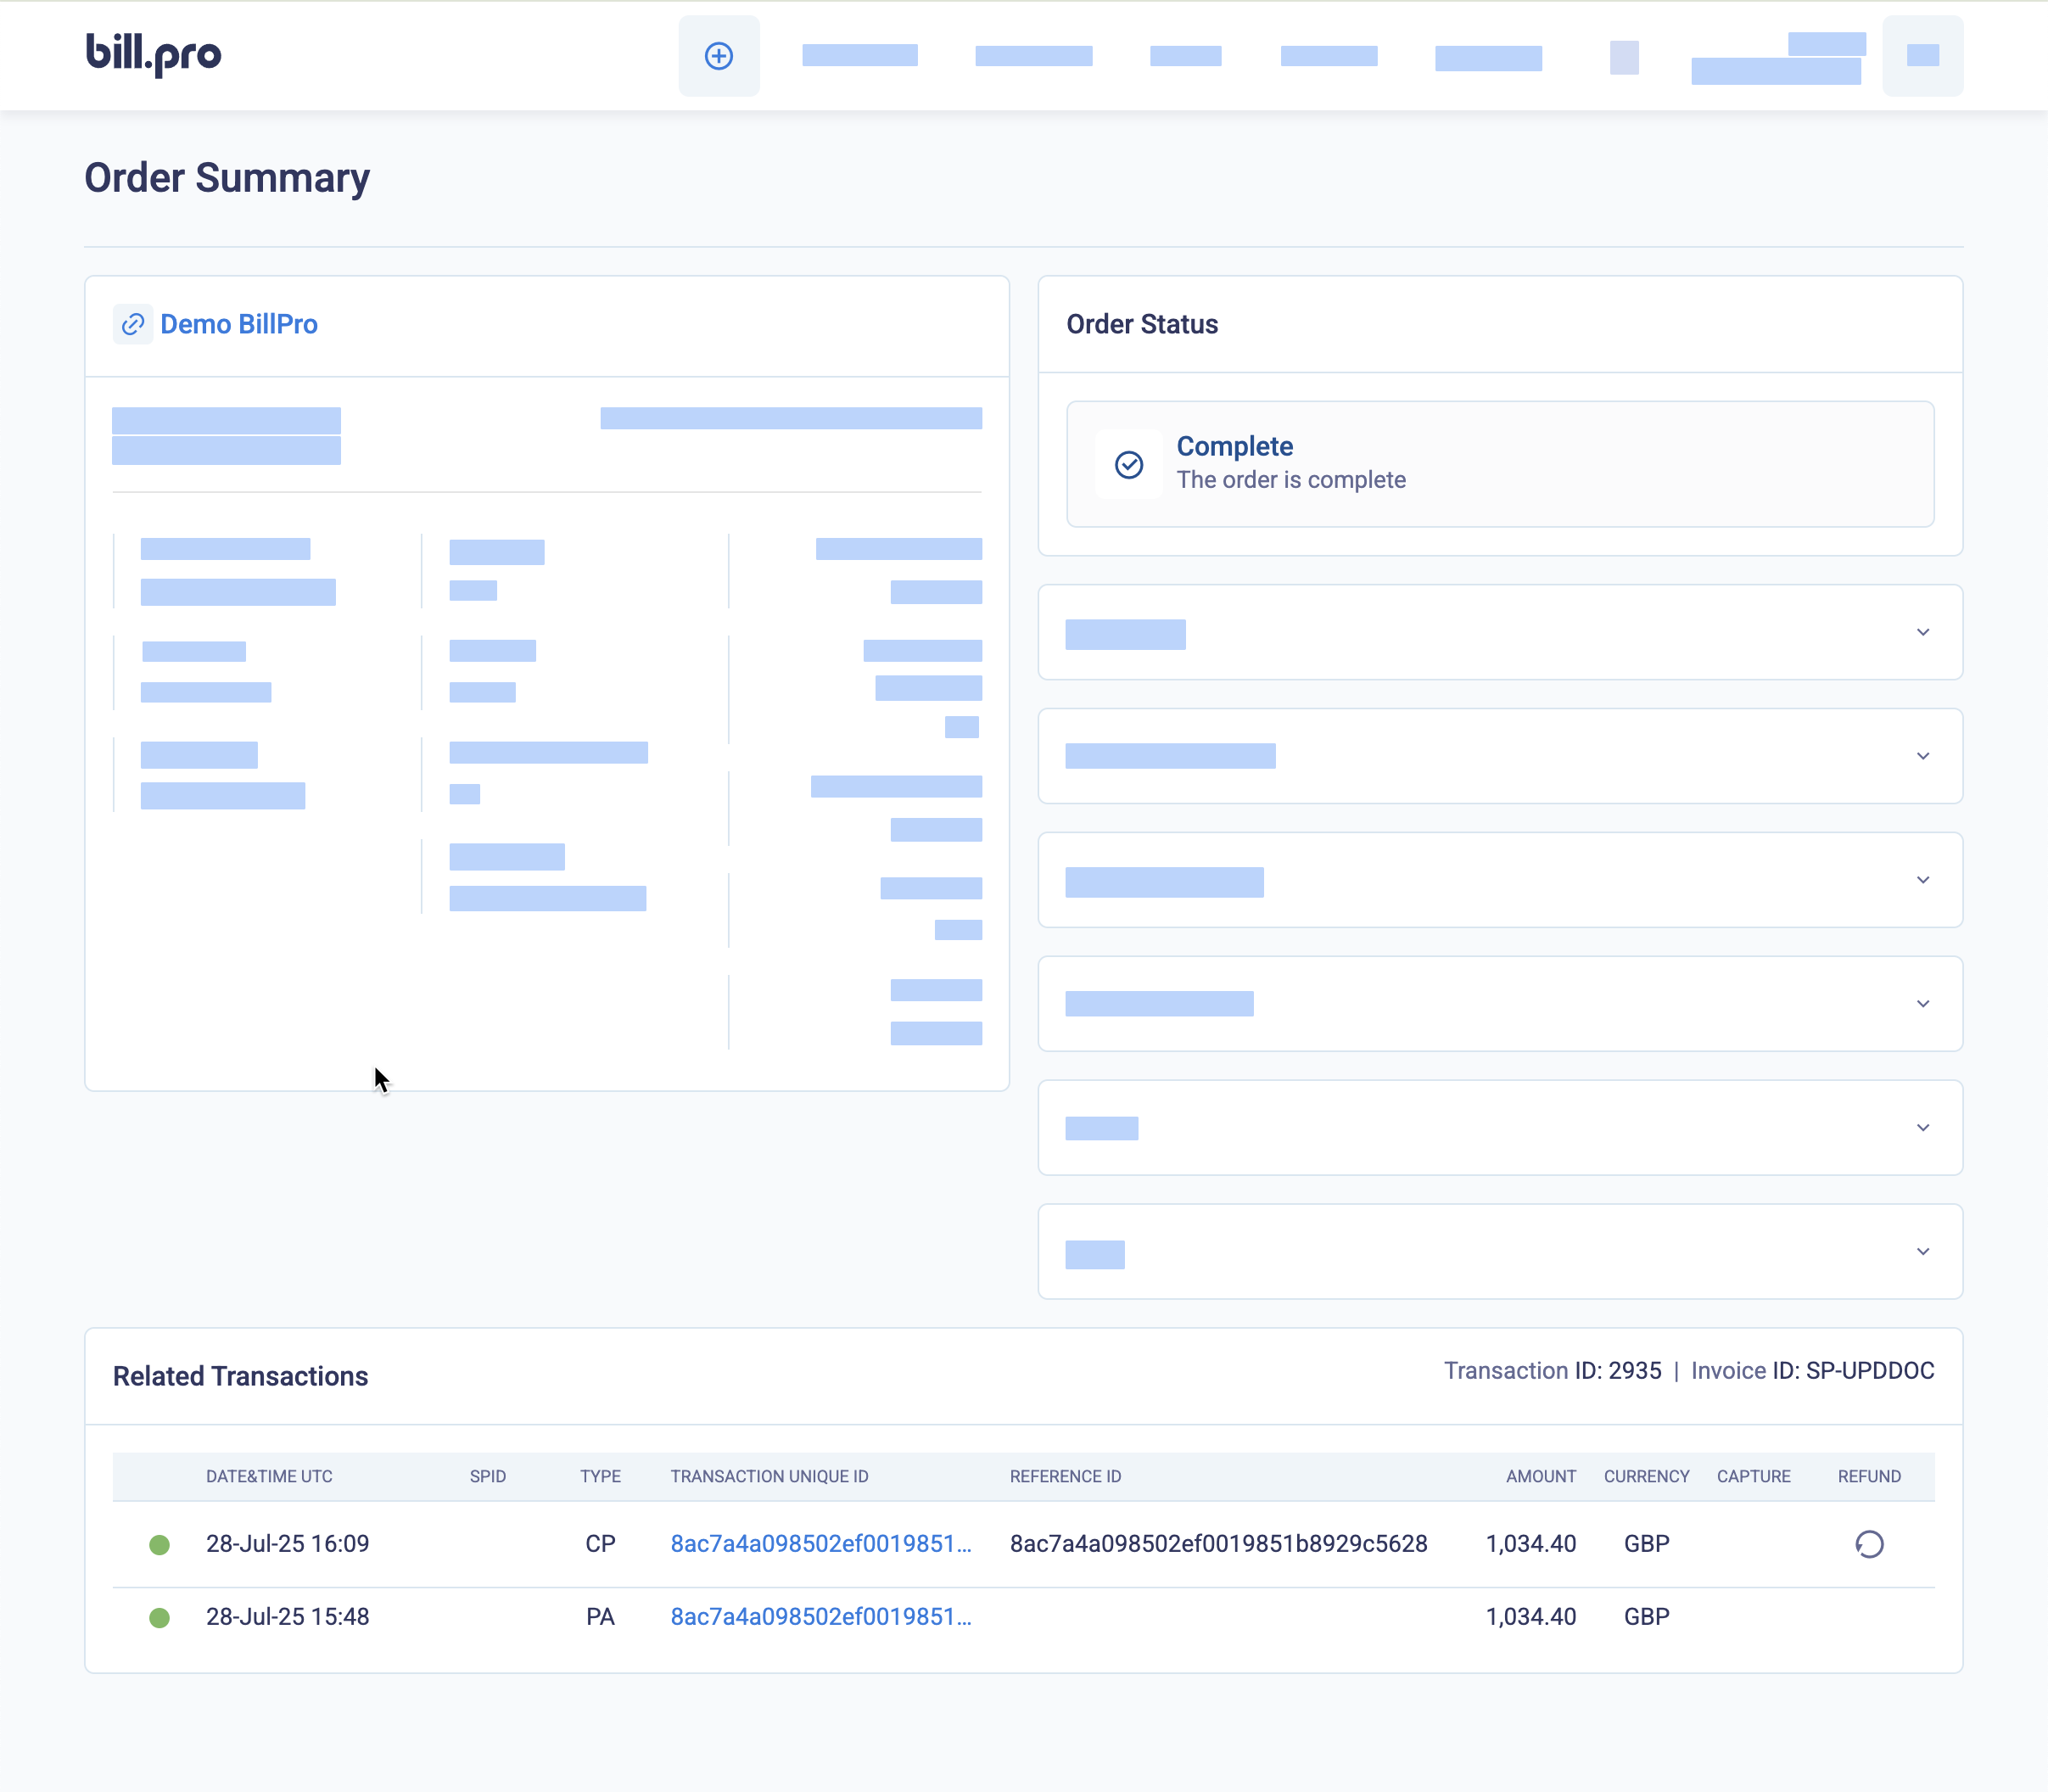
From the order portal, the customer can view their order, and download an order summary in PDF format. The customer can also view their billing history. In addition, you can activate the option to generate PDF invoices, receipts, and credit notes. Then the customer can download them from the order portal.
If the order has recurring payments, the customer can manage their cards (by adding a payment method, selecting another payment method, or removing an unused payment method). If a card is expiring, expired, soft-declined, or hard-declined, the customer can update the card only.
If the order is a subscription, the customer can cancel their order from the order portal.
There are also some some small differences between the order portal and the BillPro UI, which are described in the Order portal overview.
To start using the PDF invoicing feature, see Activate PDF invoices, receipts, and credit notes.
Workflow changes
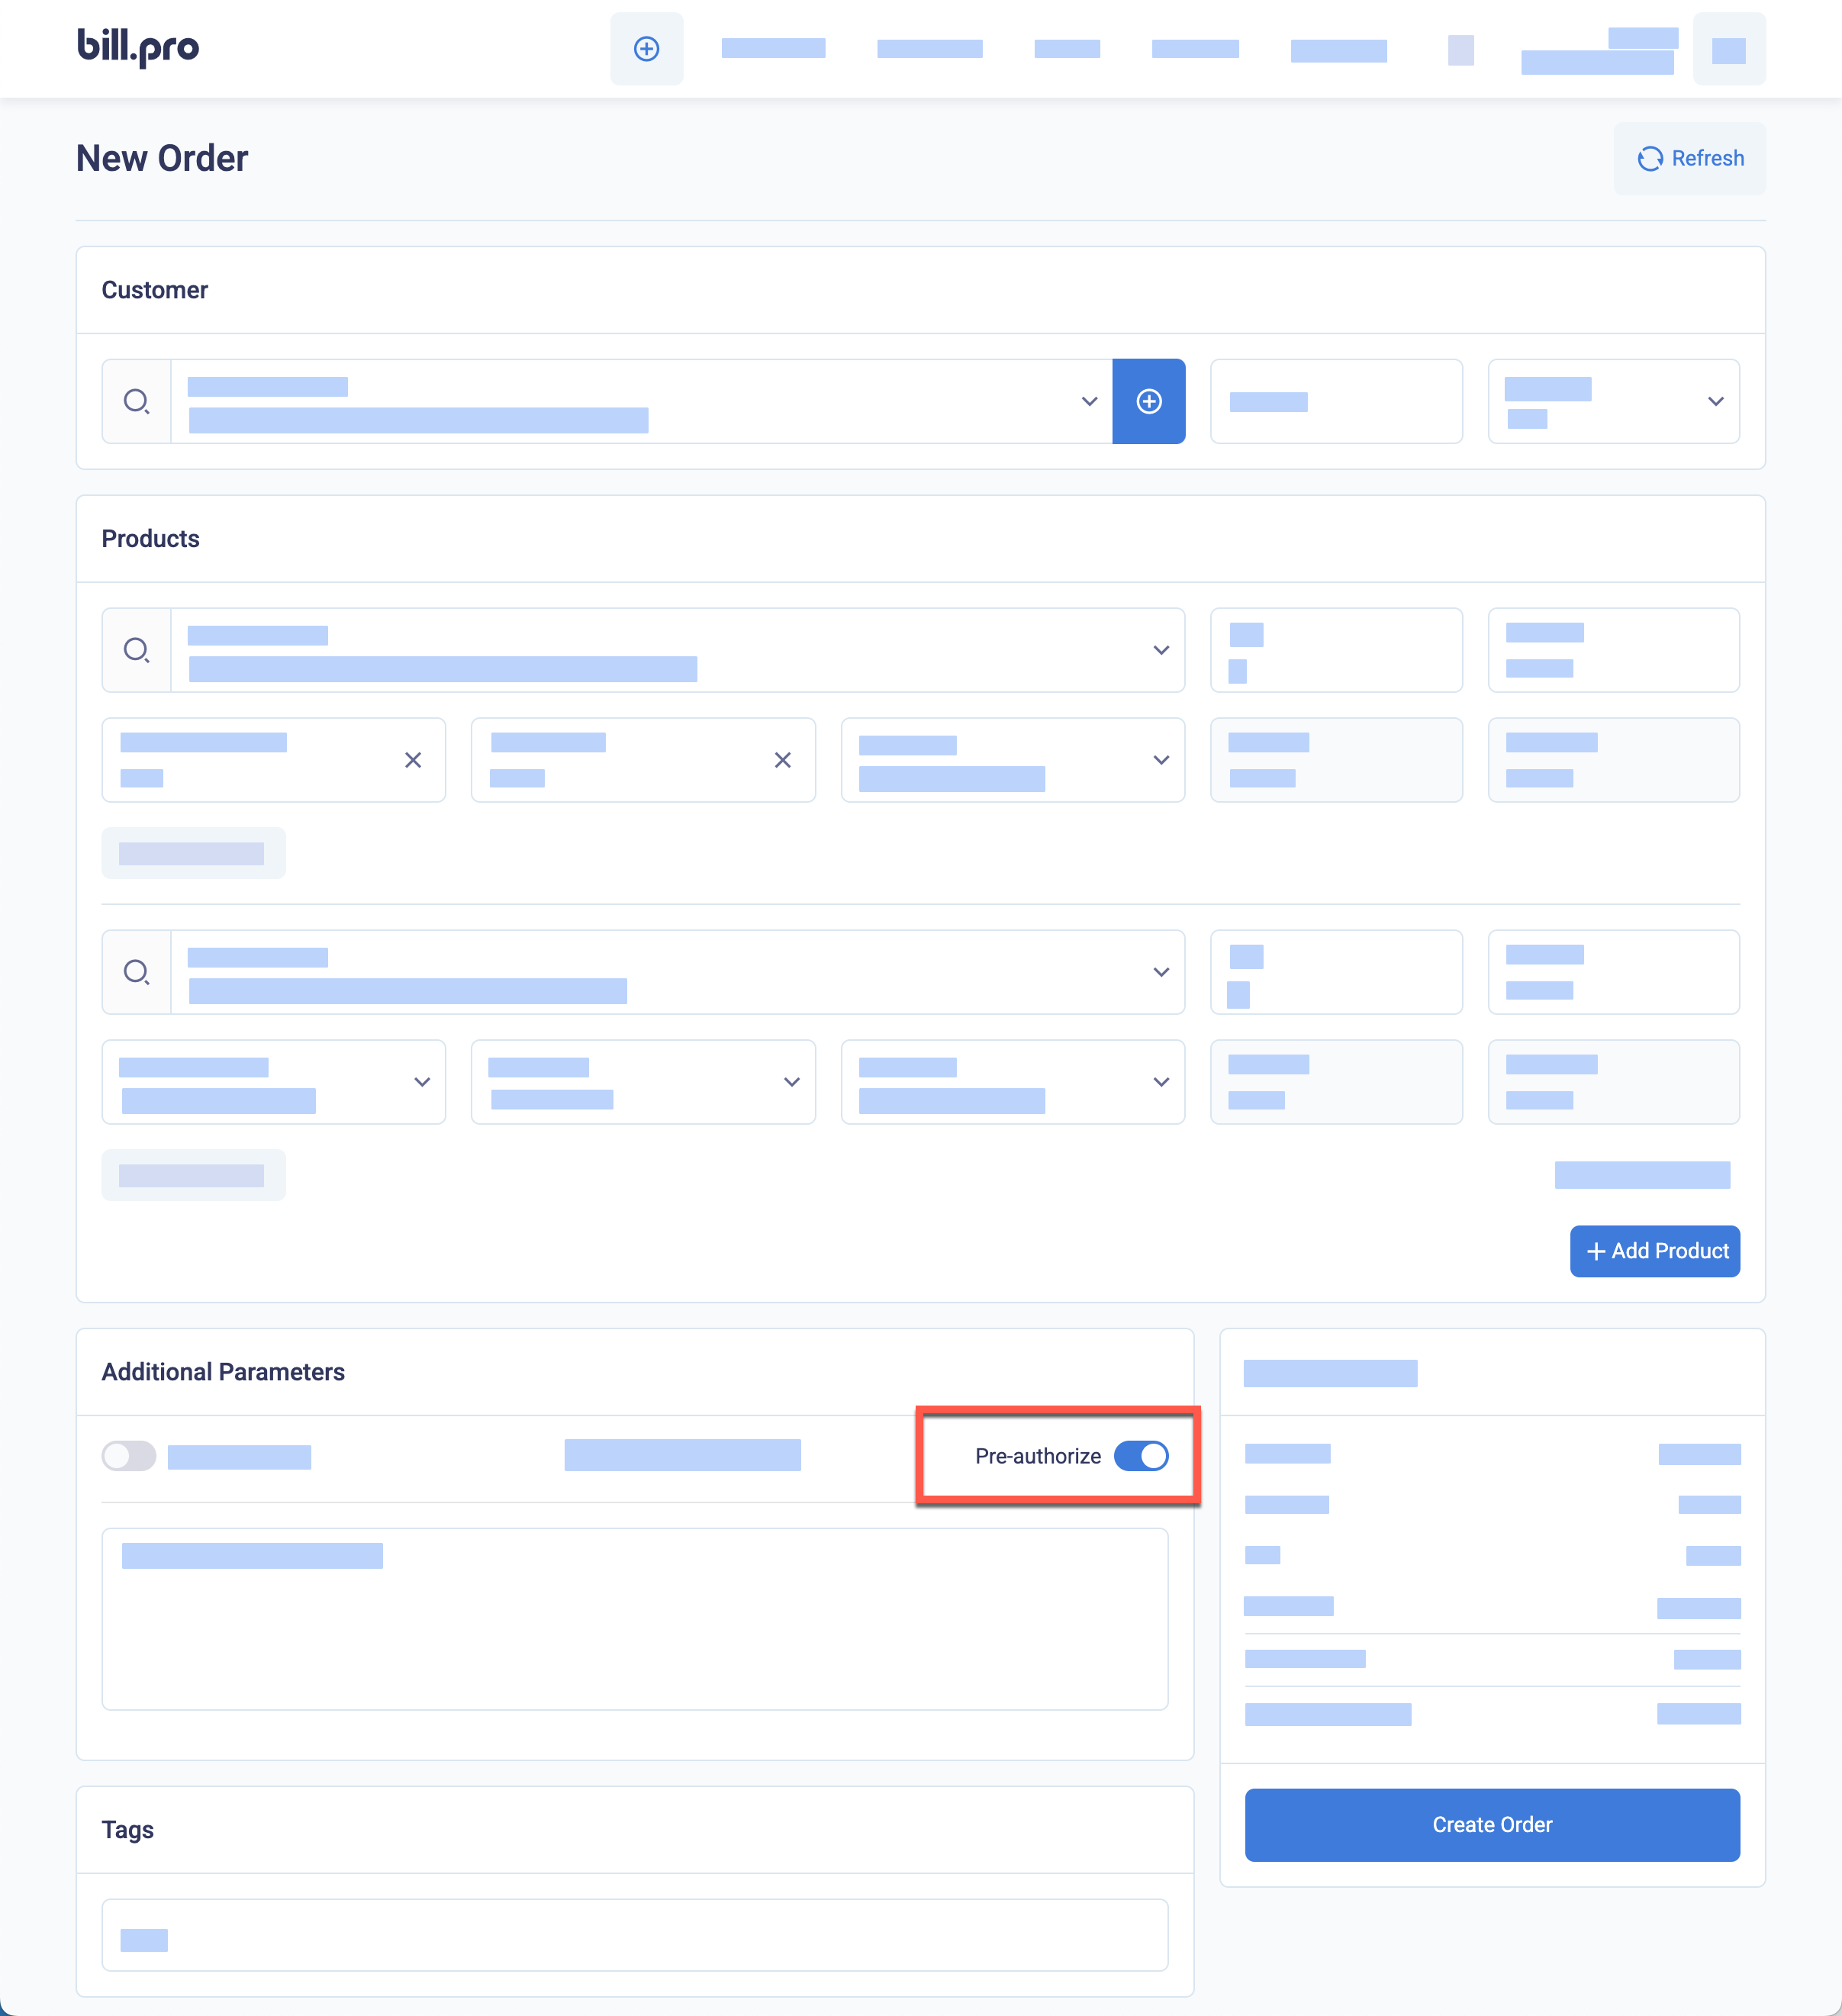
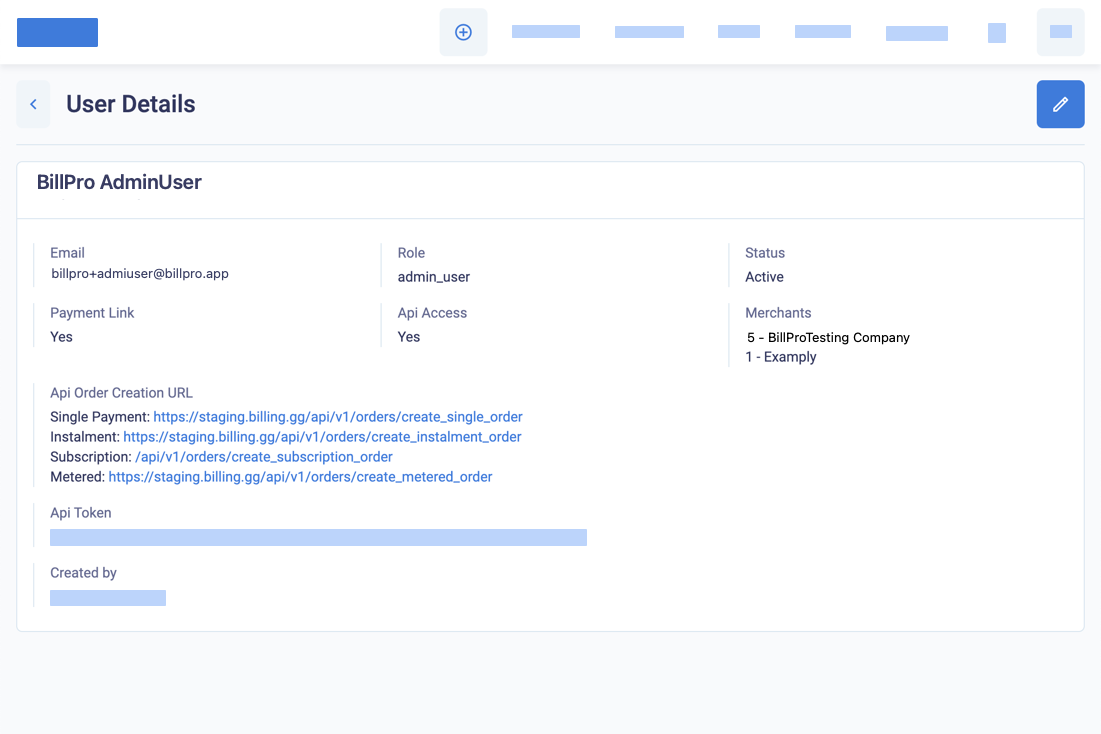
A payment link now opens the order portal checkout. After the customer successfully makes an initial payment (or authorisation or card registration), the customer can click a link to open the order portal.
flowchart LR
 A[payment link] --> B[checkout] -->|approved|C(order portal)
classDef yellow fill:Ivory,stroke:#333,stroke-width:0.5px
classDef orange fill:NavajoWhite,stroke:#333,stroke-width:0.5px
classDef pink fill:Pink,stroke:#333,stroke-width:0.5px
classDef blue fill:#cfefff,stroke:#333,stroke-width:0.5px
classDef white fill:white,stroke:#fff,stroke-width:0.5px
classDef lilac fill:GhostWhite,stroke:#333,stroke-width:0.5px
classDef green fill:HoneyDew,stroke:#333,stroke-width:0.5px
classDef grey fill:#eee,stroke:#333,stroke-width:0.5px
linkStyle default stroke:#333,stroke-width:0.5px,color:#333
class A blue
class B blue
class C pink
After the initial payment, all payment links, including the initial payment link, will now open the order portal. The new functionality described above is now available to the customer in the order portal.
flowchart LR
 D[payment link] --> E(order portal)
 E --> F(view order)
 F --> M(download order
 summary)
 E --> G(manage cards)
 E --> H(billing history)
 H --> J(download invoices,
 receipts, and
 credit notes)
 E --> I(cancel
 subscription)
classDef yellow fill:Ivory,stroke:#333,stroke-width:0.5px
classDef orange fill:NavajoWhite,stroke:#333,stroke-width:0.5px
classDef pink fill:Pink,stroke:#333,stroke-width:0.5px
classDef blue fill:#cfefff,stroke:#333,stroke-width:0.5px
classDef white fill:white,stroke:#fff,stroke-width:0.5px
classDef lilac fill:GhostWhite,stroke:#333,stroke-width:0.5px
classDef green fill:HoneyDew,stroke:#333,stroke-width:0.5px
classDef grey fill:#eee,stroke:#333,stroke-width:0.5px
linkStyle default stroke:#333,stroke-width:0.5px,color:#333
class D blue
class E pink
class F pink
class G pink
class H pink
class I pink
class J pink
class M pink