Manage users
Onboard your sales team to BillPro
As the merchant administrator, you can create accounts for your users, and allow them to access one or more merchant profiles.
To allow access to different functions in the platform, for each user, you can select from four user roles.
- An admin_user has full access, including managing users, currencies, products, customers, orders, refunds, dashboards, payments, and reports, and viewing merchant details.
- An acountant_user has almost full access but they cannot manage products, users, or view merchant details.
- A normal_user has limited access and can view products and manage customers, orders, and refunds.
- A restricted_user can only view products and manage their own customers and orders.
Create a user
To create a user, do the following steps.
-
Log in as a user with the
admin_userrole. -
In the navigation bar, go to the user account icon.
-
From the user account menu, select Users.
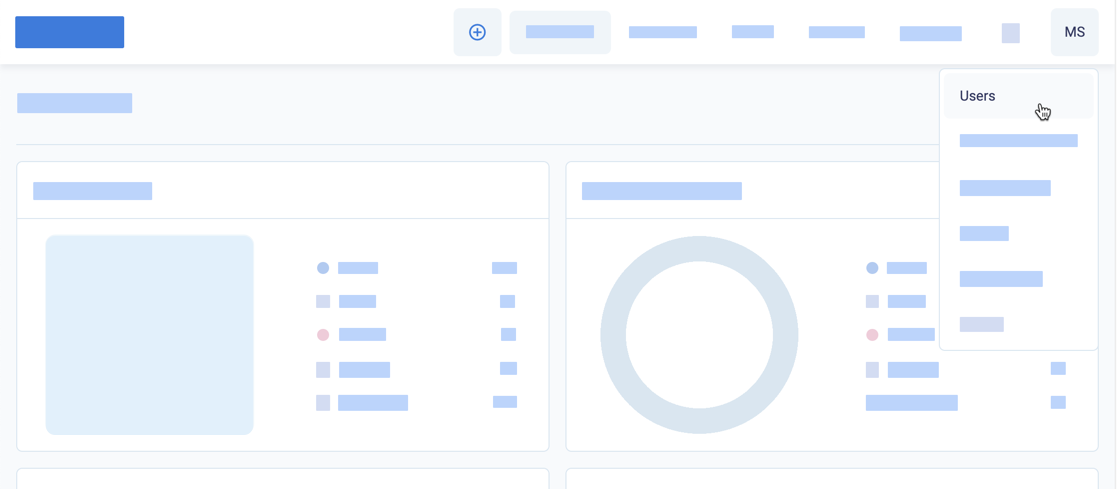
Select users from the user account menu
-
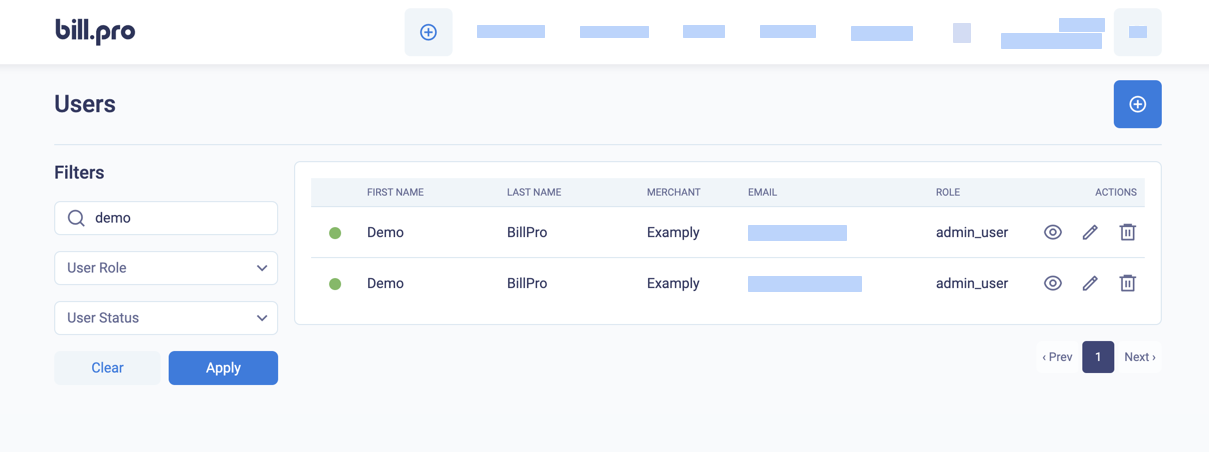
At the top right of the Users list, click (+).
Add a user in BillPro
-
On the New User screen, enter the user's details.
-
By default, a new user is
Active, which means they can log in to BillPro. -
Select Payment link to let the user create payment links. This option displays the buttons and options to send payment links by email or SMS and to display a QR code and URL. You could leave this option inactive if the user will only accept phone payments with the virtual terminal. See Payment channels.
-
If you are creating an integration, to create users for developers and integration users, select API access to generate API credentials. The API user should have the
admin_userrole. To display the API token at any time, display the User details, for example, by clicking the eye display icon beside the user in theUserslist. -
Select one or more profiles for the user.
-
Select a Role as described in the user roles table.
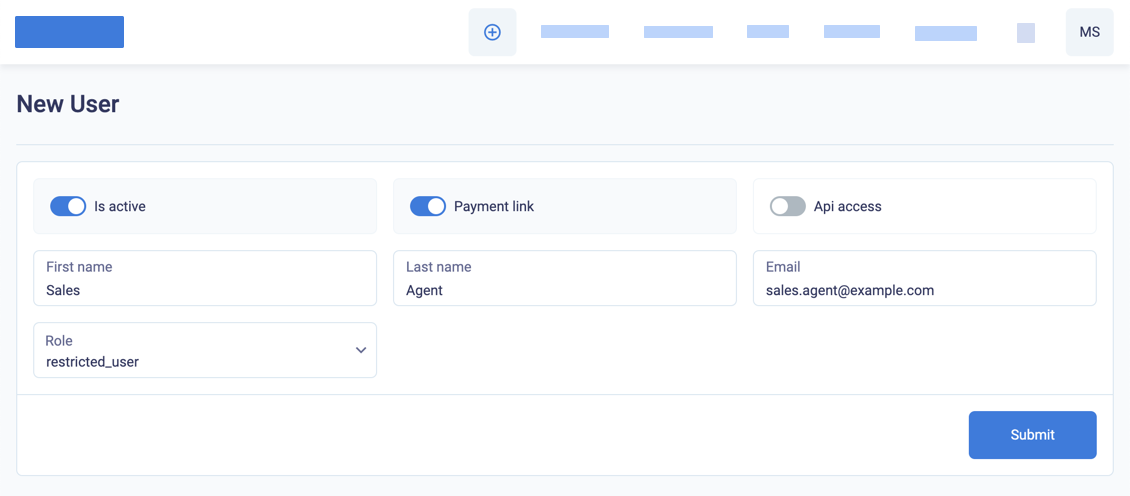
Enter user details to create a new user
-
-
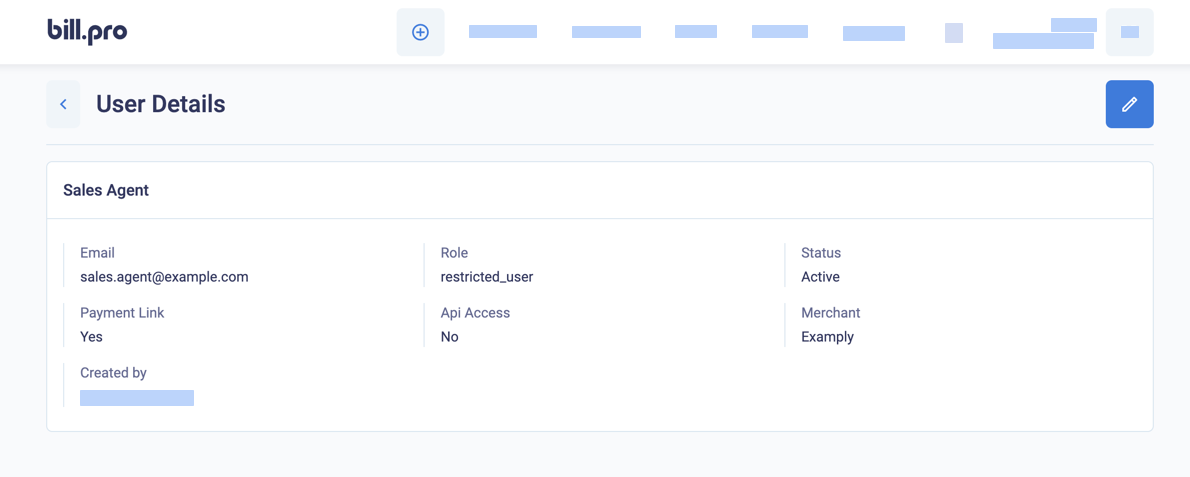
Click Submit. BillPro displays the User Details screen, which can include API credentials. You can edit the user from here or the main Users list.
User details screen
Display user details
To display user details, do these steps.
-
In the navigation bar, check that you are in a profile the user has access.
-
Go to the user icon menu and select Users.
-
In the Users list, click the eye display button beside the user.
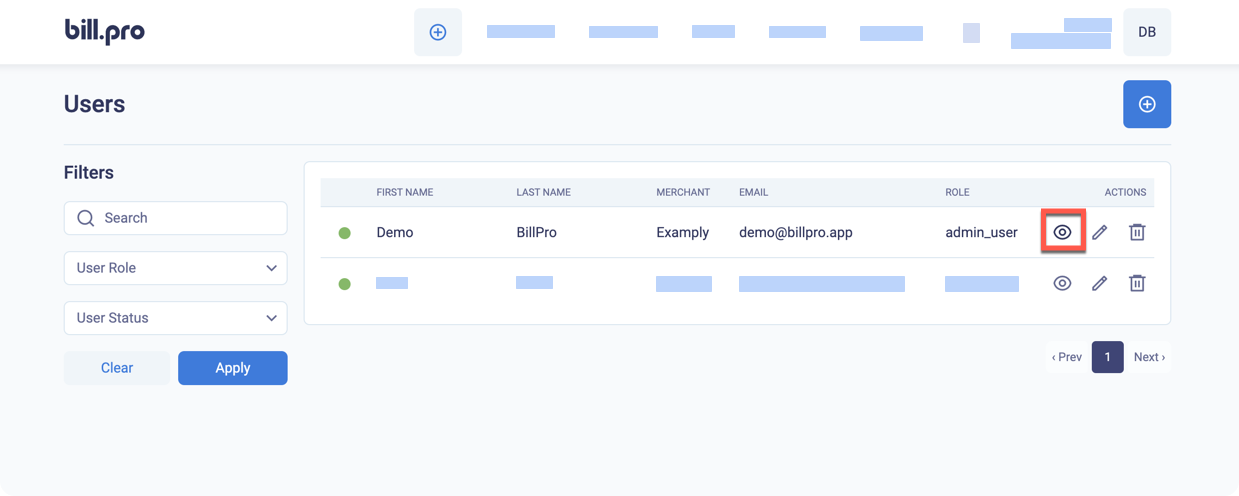
Users list
From the User Details view, you can obtain the API key and edit the user.
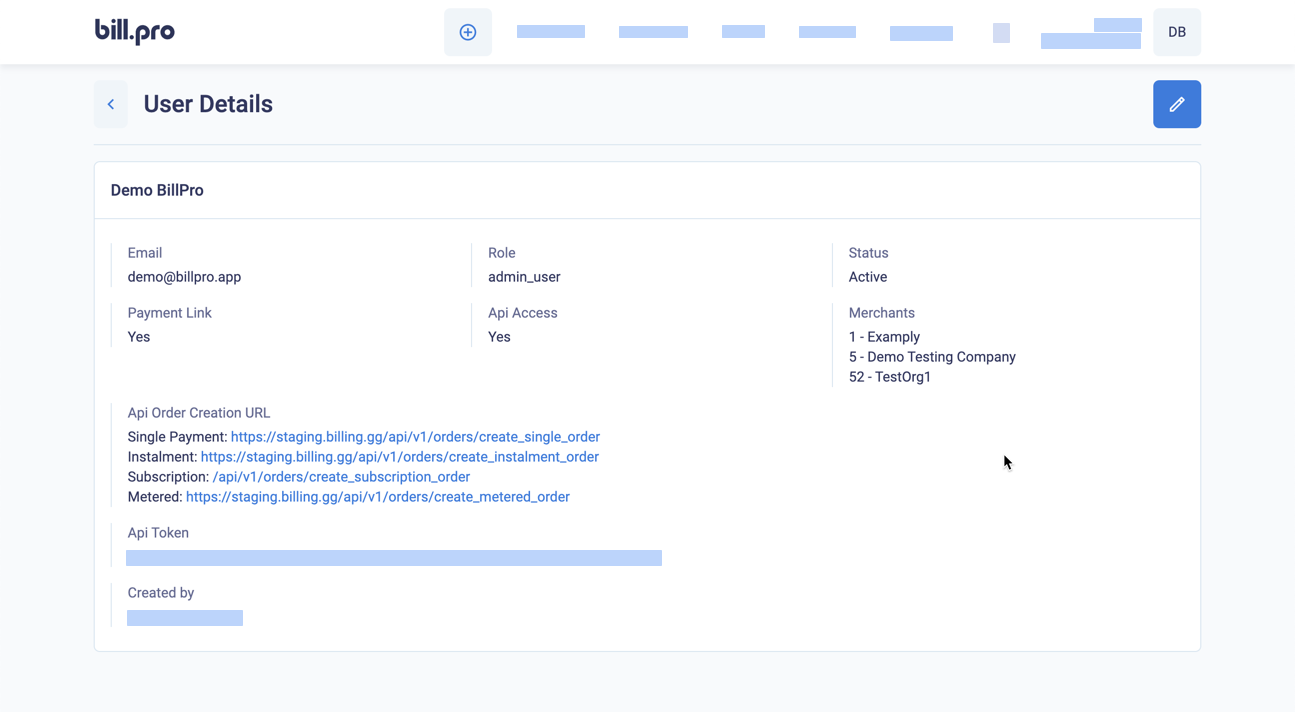
User details view
Edit a user
To edit a user account, do these steps.
-
In the navigation bar, go to the user icon menu and select Users.
-
In the Users list, click the pencil edit button beside the user.
-
Change the user account as required.
-
To change the user's access to functionality, select a new Role. See User Roles below.
-
To change the user's access to merchant profiles, add or remove profiles.
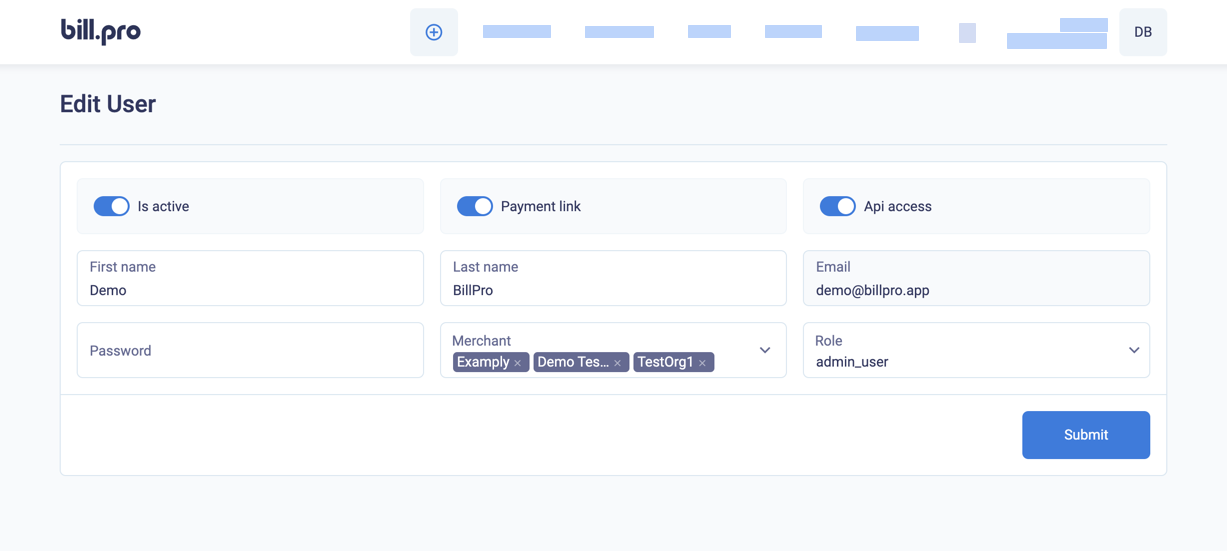
Edit a user
-
-
Click Submit.
-
To implement the changes to the user account, tell the user to refresh their BillPro screen in the browser.
Deactivate a user
You cannot delete a user account, but you can deactivate it. Edit the user account and click the Is active toggle switch to deselect it, then click Submit.
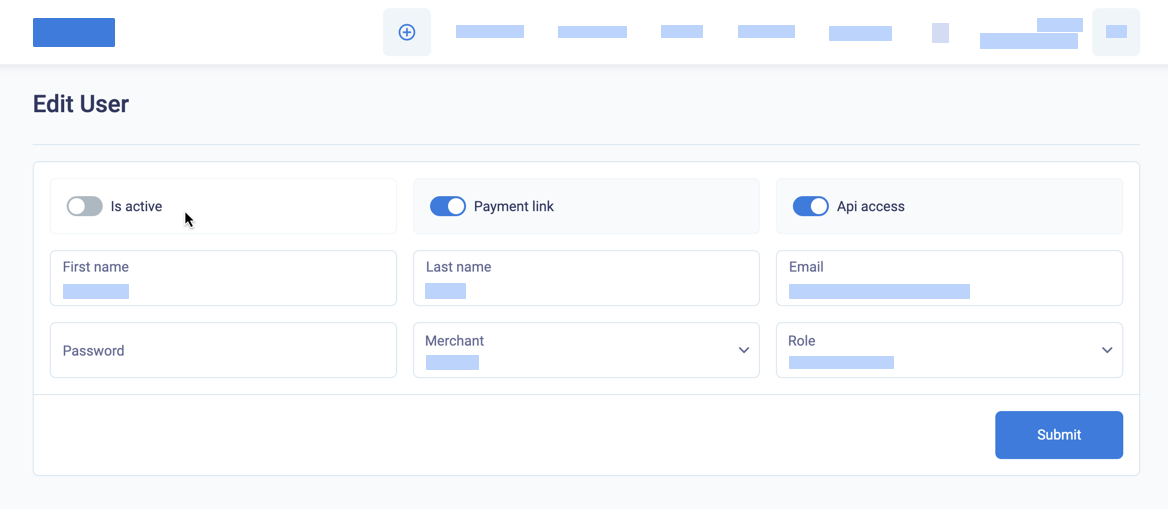
Edit a user to make their account inactive with the Is active toggle switch
In the Users list, the user will display a grey flag for inactive instead of a green flag for active, and the user will not be able to log in to BillPro.
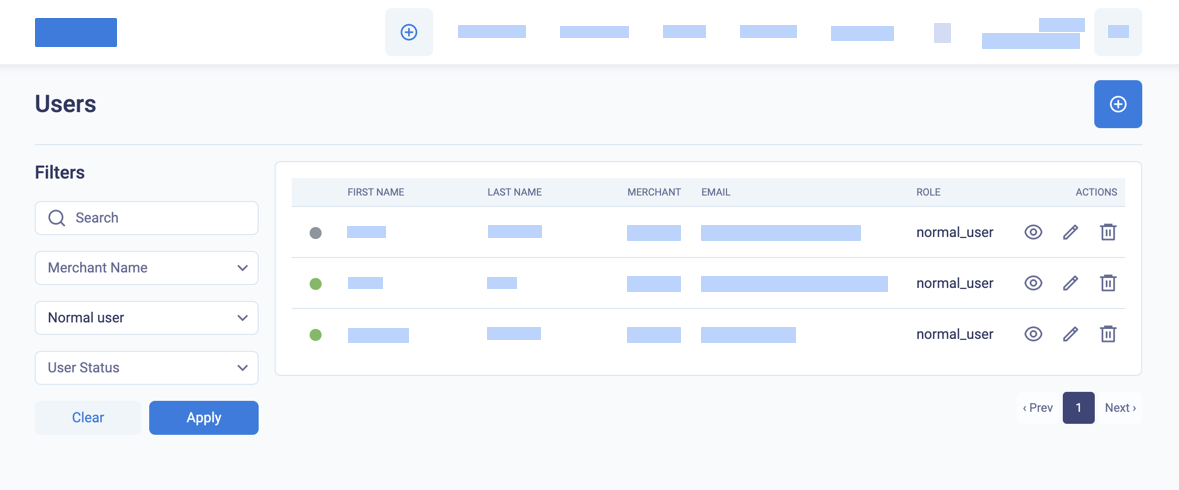
Inactive users display with a grey flag in the Users list
User roles
The following table fully describes access to functionality for all user roles. An x character means that the user can access the functionality.
| Category | Privilege | admin_user | accountant_user | normal_user | restricted_user |
|---|---|---|---|---|---|
| Dashboard | Display | x | x | ||
| Customers | Import CSV | x | |||
| Customers | Display | x | x | x | x own |
| Customers | Create | x | x | x | x |
| Customers | Edit | x | x | x | x own |
| Customers | Deactivate | x | x | x | x own |
| Products | Display | x | x | x | x |
| Products | Create | x | |||
| Products | Edit | x | |||
| Products | Deactivate | x | |||
| Orders | Display | x | x | x | x own |
| Orders | Create | x | x | x | x |
| Orders | Edit | x | x | x | x own |
| Orders | Cancel/Complete | x | x | x | x own |
| Orders | Authorise Refunds | x | x | x | |
| Payments | Billing Exceptions | x | x | x | |
| Payments | Pending Orders | x | x | x | |
| Payments | All Processed | x | x | x | |
| Email Notification | Display | x | x | ||
| Email notification | Deactivate | x | x | ||
| Currency Pairs | Display | x | x | ||
| Currency Pairs | Edit | x | x | ||
| Reports | Display | x | x | ||
| Reports | Generate | x | x | ||
| Reports | Download | x | x | ||
| Users | Display | x | |||
| Users | Edit | x | |||
| Users | Create | x | |||
| Users | Deactivate | x | |||
| Profiles | List | x | x | x | x |
| Merchant profile | Profile Information | x | |||
| Merchant Profile | Payment Configuration | ||||
| Merchant profile | Processing Details | x |
.