Manage customer accounts
View customer details, payment details, events, notes, and tags
To display and manage a customer account, do these steps.
- In the navigation menu, go to Customers. BillPro displays the customer list.
- If the customer is not shown on the first page in alphabetical name order, you can use the page controls to move through the pages. Or, in Filters, enter text to search for the customer name, ID, or email and click Search.
- In the Customers list, click the customer's NAME.
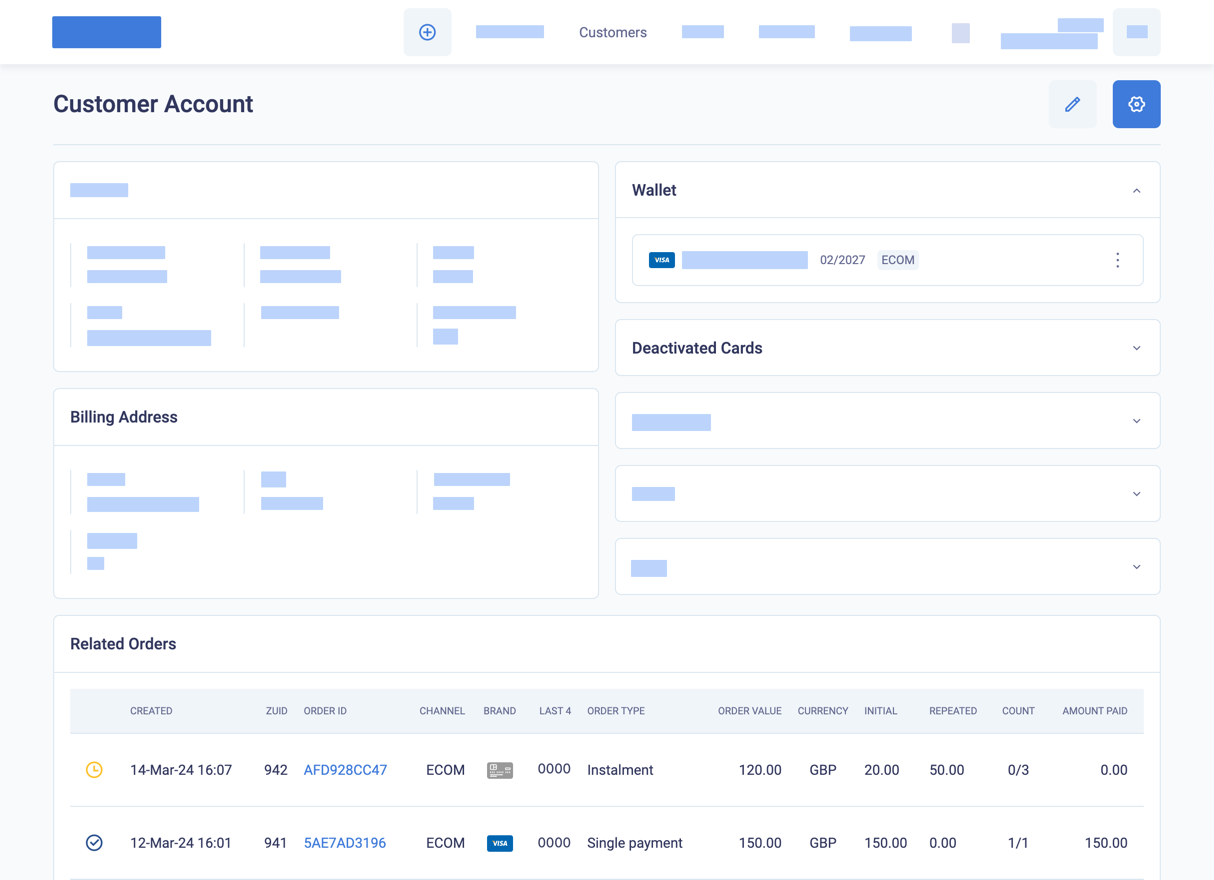
The Customer Account will display the customer's details, active cards in the Wallet, and any Related orders.

Customer account with a card and related orders
To edit customer details and tags, click the pencil edit button.
Changes to customersChanges to customers apply to new orders, not existing orders.
For information about managing cards, see Update cards and Manage customer cards.
Related Orders
The following elements are displayed in the summary of related orders of a customer.
| Column | Description |
|---|---|
| Order status | See Order status |
| Created | The date and time when the order was created in UTC format. |
| ID | The unique ID for the order in the BillPro system. Click on the ID to view the Order Summary |
| Order ID | The merchant order ID. Entered by the user or automatically created by BillPro when you create an order. |
| Channel | The channel abbreviations are ECOM for e-commerce and MOTO for mail order telephone order. The channel is defined when a card is registered, but it can change during the payment processing flow. For example, a payment with the virtual terminal that requires 3DS will always be processed in the ECOM channel. |
| Brand | Card brand, such as VISA or MASTERCARD |
| Last 4 | The last 4 digits of the card number which can help identify the card to the customer |
| Order type | The payment type of the order. If the product's payment configuration is not locked, this may differ from the payment type of the product. You can select the option to split payments to create instalments. Or you can deselect it to collect a single payment instead of instalments. |
| Order value | The amount of the order. For a single payment or instalment product, this is the full amount of the order. For a subscription, this is the amount of the recurring payment. For a metered order, this is the initial amount. |
| Currency | The order currency, which by default is the currency of the customer account |
| Initial | The initial amount of the order. |
| Repeated | The recurring payment amount of the order for instalment and subscription orders. |
| Count | The number of payments collected successfully and the total number of payments the customer will make. For a subscription or metered order, the order is active until cancelled. So the two hyphens (--) after the slash (/) represent an unknown total number of payments. |
| Amt paid | The total amount of the payments processed successfully. |
Create an order for a customer
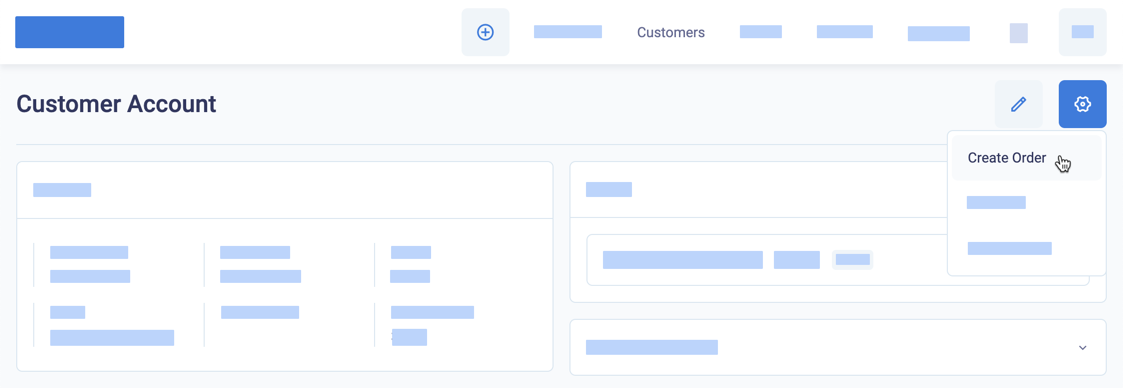
To create an order for a customer, go to the gear options menu in the top right corner, and select Create Order.

Create an order for a customer
For full details, see Create orders.
Record customer interactions in notes
To record your interactions with a customer, create notes that do not display for the customer. You can view and enter Notes when you display the customer account. Do not enter any sensitive information in the notes.
PCI ComplianceTo save card details, you must use the 3D secure virtual terminal.

Display and take notes about a customer in the customer account view
Group or classify customers
To group or classify customers, you can use Tags. Tags are text labels for internal use only. You can assign tags to a customer when you are creating the customer, and you can change them later. You can use the same tags for orders and customers. As an example of how you can use tags for customers, you can assign a VIP tag to your best customers to ensure they get the best offers.
To edit Tags, edit the customer account by clicking the pencil edit button, and enter a new tag text or select existing tags.

Edit tags to group the customer
Display events for a customer
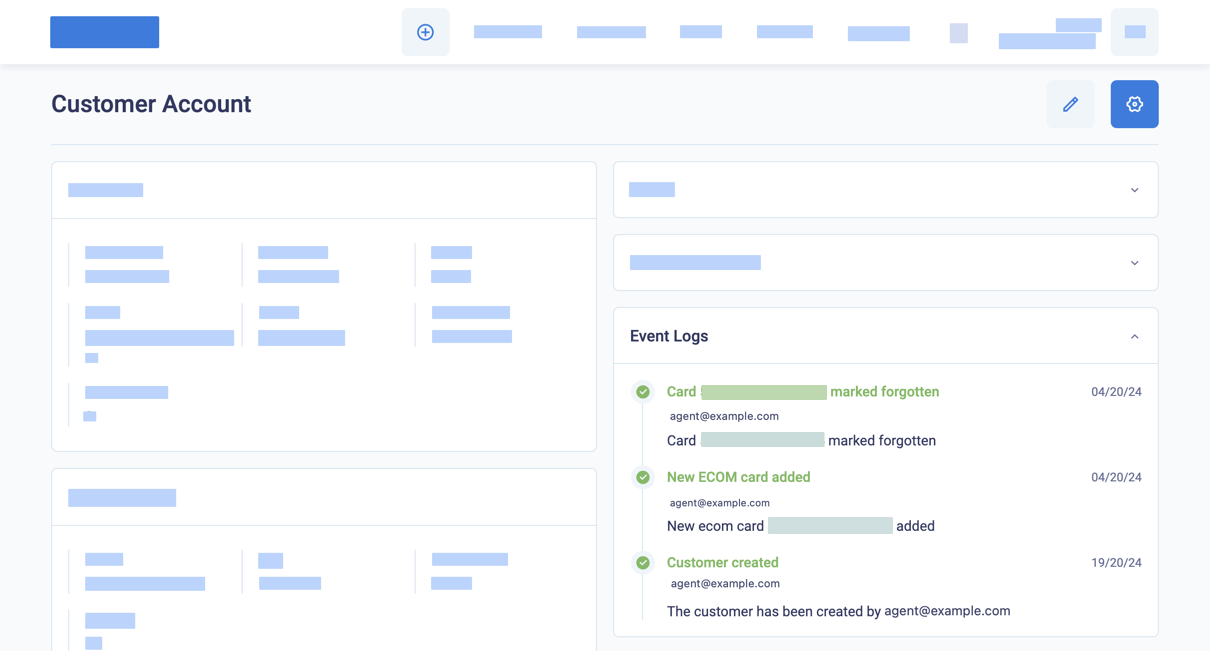
To display a record of actions on the customer account, open the Event Logs section on the right side of the Customer Account page.

Display events for a customer
Deactivate a customer account
You can't delete a customer account, but you can deactivate it. When you deactivate a customer account, you can't create orders for the customer unless you activate it again.
Scheduled paymentsIf the customer has live orders with recurring payments, you can deactivate the customer account. But BillPro will continue to collect billing events for these orders.
To deactivate a customer account, do the following steps.
- In the navigation menu, go to Customers
- Select and click on a customer's NAME to open the Customer Account.
- Check the Related Orders section at the bottom of the screen. To deactivate these orders, manage them according to the order state. See Cancel an order and Mark an order as complete.
- Go to the gear options menu in the top right corner and select Mark Inactive.

Mark a customer as inactive
The Mark Inactive option changes to the Mark Active option.
The inactive customer displays a grey flag in the Customers list.
Report on inactive customersWhen you create a Customers Report, you can select the
dormantstatus to obtain details of all inactive customers.
Updated 4 months ago
Manage cards, create orders, and create products to sell to customers.
