Create a subscription
Tutorial to create a subscription order with recurring payments
Learn how to create a subscription product and order with BillPro.
Subscription purchase typeTo work through this tutorial, your merchant be able to create
Subscriptions. This option must be activated in your merchant configuration.
When you offer a subscription product, you may have an introductory offer or trial period. So this tutorial starts with how to create a discount. You can choose to apply the discount to the first payment of the subscription or all payments. Then, you will create a subscription product, and, finally, a subscription order.
Create a discount
This section describes how to create a discount and select when it will apply to your product. You can also create fees and taxes in a similar way to discounts. BillPro calculates taxes on the product price with fees and discounts applied.
To create a discount, do the following steps.
-
In the navigation menu, go to Products > Discounts.
-
Click (+). The New Discount section opens.
-
Enter a Discount Name.
-
To calculate the discount as a percentage, select Calculate Percentage.
-
Enter the Discount Amount.
-
(Optional) Enter a Discount Description.
-
To save the discount, click Save Discount.

Create a discount
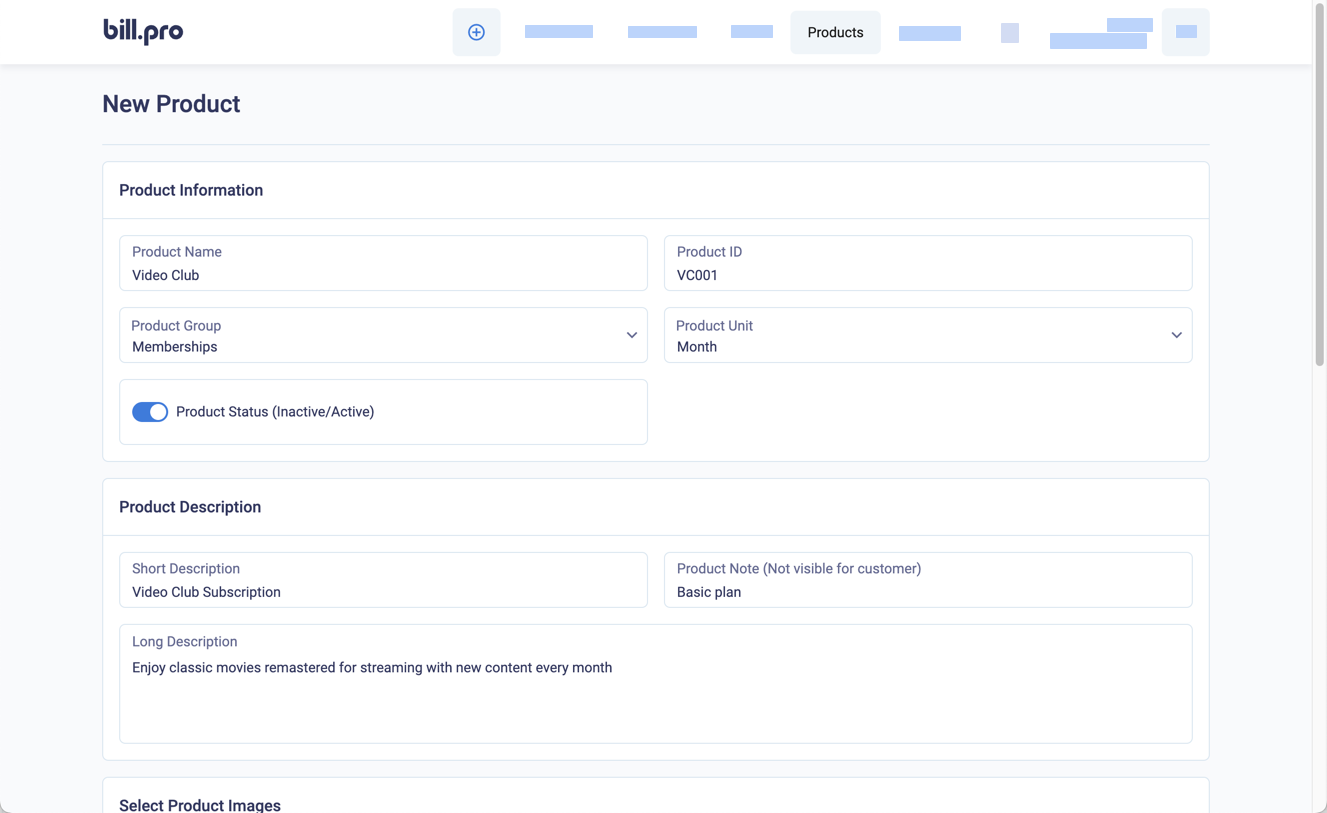
Create a subscription product
Next, you will create a subscription product, and you can select your discount and, of course, any fees or taxes.
To create a subscription product, do the following steps.
-
In the navigation menu, click (+) and select Add Product. The New Product section opens.
-
For Product Information, enter a Product Name.
-
For the Product ID, you can enter your own identifier to help you find the product when searching. If you don't create one, BillPro creates a Product ID for you.
-
Enter the Product Description.
-
For the Price, enter the amount of each scheduled payment, with tax.
-
In Select Discount, enter text in the discount name and select the discount.
-
For the Product type, select Subscription.
-
In Payment, select Apply discount to initial payment only.
-
Click Save.
Create a subscription product
Create a subscription order
To create a subscription order, do the following steps.
- On the navigation bar, click (+) and select Add Order. The New Order section opens.
- For the Customer field, select your customer. If you haven't yet created a customer, click the (+) button and enter your customer details.
- For Products, select your subscription product.
- Click Show options. When the product's pricing configuration is not locked, you can select discounts, fees, and taxes. BillPro calculates taxes on the product price with fees and discounts applied. Taxes are inclusive, and for display purposes.
- Check the subscription details and click Save.
Create a subscription order
BillPro creates the draft order and goes to the payment screen. Here you can collect the initial payment. To accept a phone payment, enter a card in the virtual terminal. To accept an online payment, send a payment link.
After the initial payment, BillPro sets the status of the subscription to Active. For a subscription, BillPro creates one billing event for the next billing cycle.
BillPro sends email notifications to your customers about their subscriptions. For example, when you pause or resume a subscription. These emails contain payment links to open the order portal. In the order portal, customers can view their order details and billing history. They can also manage cards, cancel their subscription, and download invoices, receipts, and credit notes.