Create product groups and pricing elements
Make pricing faster and more accurate in products and orders
You can use product groups and pricing elements to make pricing faster and more accurate in products and orders (in the UI). The following table describes these elements in BillPro.
| Element | Use | Notes |
|---|---|---|
| Groups | To organise and segment your products and filter the products in the catalogue | For example, a general property insurer might create groups to segment their policies by Home, Automobile and Watercraft. |
| Units | To describe the increments by which your products are divisible. | For example, item, hour, month, km, kg, plan. |
| Discounts | To decrease the price of products and orders by a percentage or an amount in the currency of the pricing of the product or order. | If product pricing is not locked, you can select discounts on products and in orders. However, in the API, you can only add custom discounts to orders. |
| Fees | To increase the gross price of the product after tax. | If product pricing is not locked, you can select fees for products and orders. However, you can only add custom fees to orders in the API. |
| Taxes | To calculate and display a tax as part of the price of a product. If product pricing is not locked, you can select a tax in an order. BillPro calculates taxes on the product price with fees and discounts applied. | Taxes are inclusive and for information purposes only. If product pricing is not locked, you can select a tax on products and orders. In the API, you can only add custom taxes to orders. |
This screenshot shows the selection of a product group and unit.
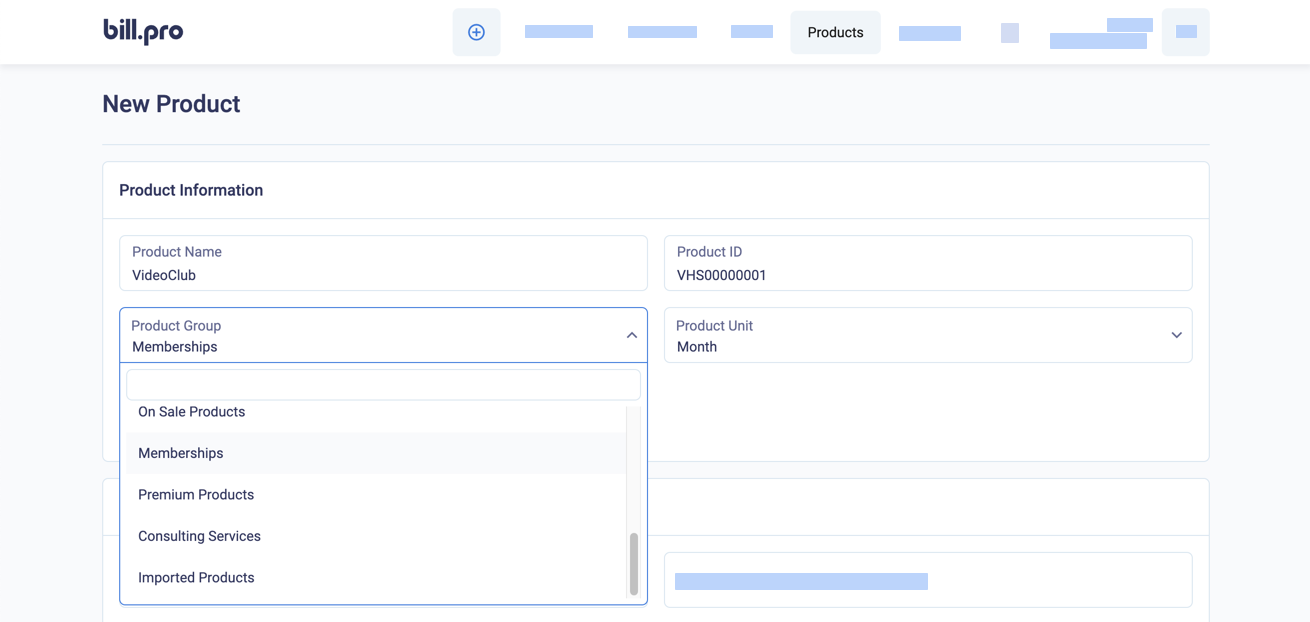
Select a product group and unit
This screenshot shows the selection of a fee in product pricing.

Select a fee when creating a product
Manage group and pricing elements
To manage group and pricing elements, in the navigation bar, go to Products and from the menu, select the element to manage.
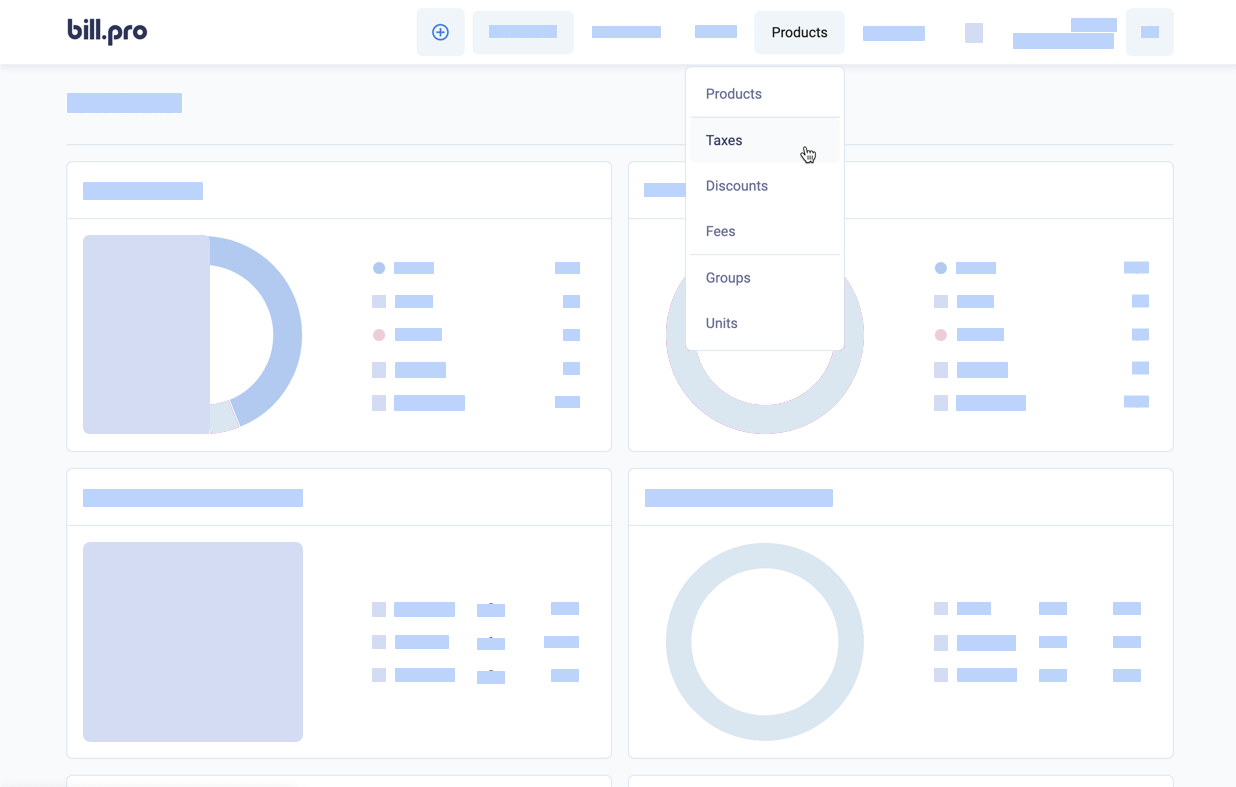
The product menu
To create product groups and pricing elements, follow the steps below.
Create Groups
To create groups, do these steps.
-
In the navigation bar, go to Products > Groups
-
In the Groups pop-up, enter the Name
-
Click Create.
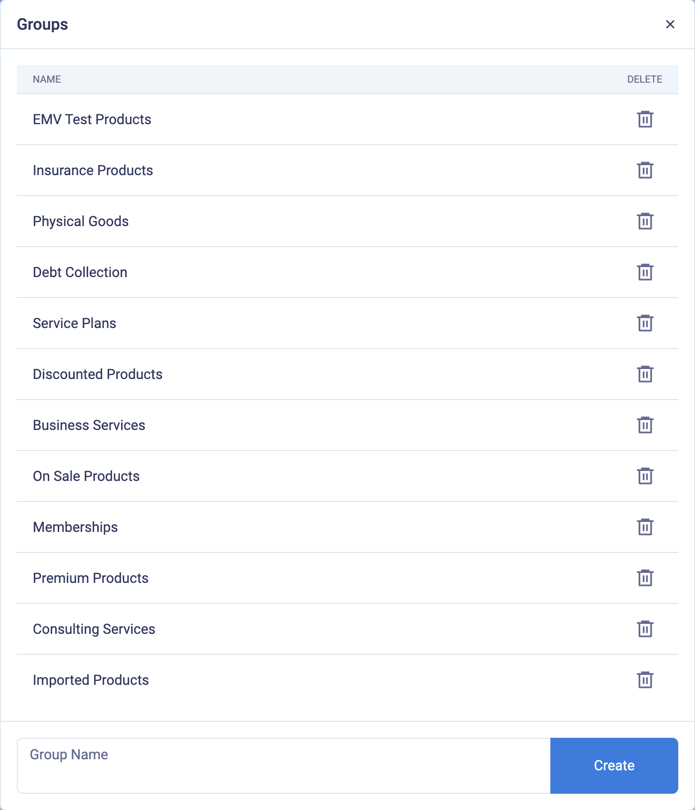
Manage groups
BillPro creates the group, which you can use to categorise your products. To rename a group, delete it and then create it again with the correct name. To delete a group, first remove it from all products. See Maintain your product catalogue.
Create Units
To create units, do these steps.
-
In the navigation bar, go to Products > Units
-
In the Units pop-up, enter the Name
-
Click Create.
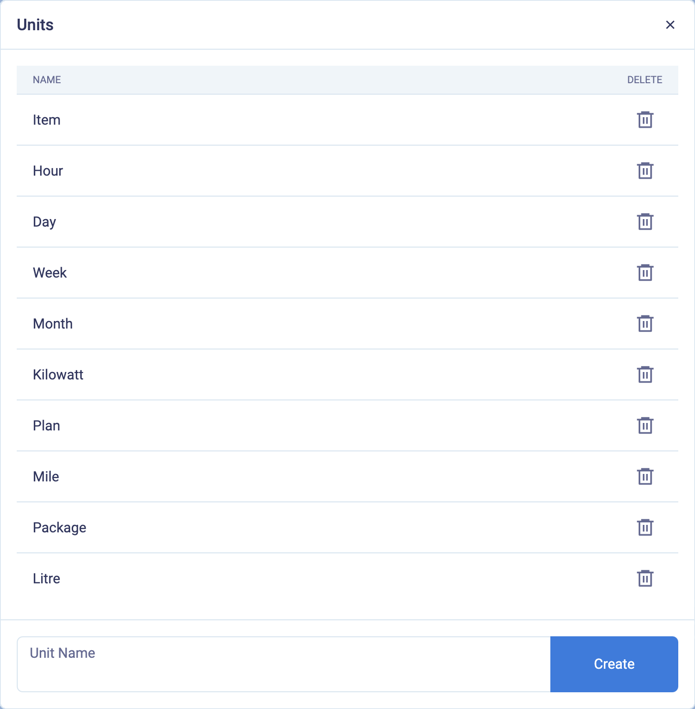
Manage units
BillPro creates the unit, and now you can use it in your products. To rename a unit, delete it and then create it again with the correct name. To delete a unit, first remove it from all products. See Maintain your product catalogue.
Create discounts
To create a discount, do the following steps.
-
In the navigation bar, go to Products > Discounts.
-
In the Discounts list, click (+)
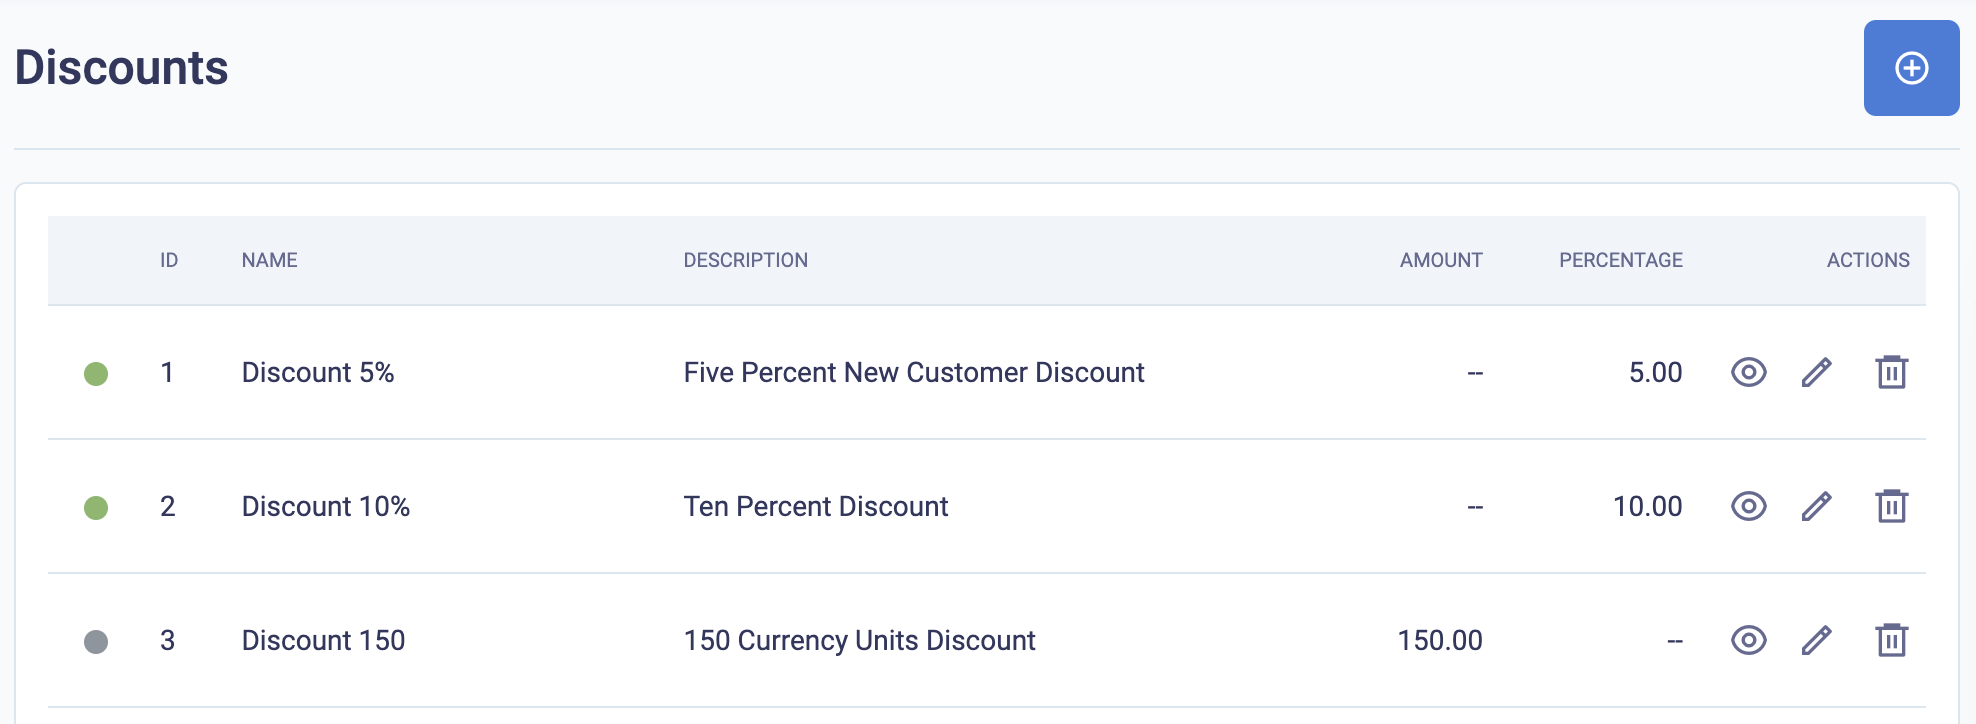
The discounts list
-
Enter the Discount Name to display for the customer at checkout.
-
Enter the Discount Description to help your users identify the discount.
-
Enter the Amount, which will be in the same currency as the product or order pricing. OR select Calculate percentage and enter a Discount Percentage amount. BillPro calculates discount percentages only on the product price, not including fees. BillPro applies taxes to the product price with fees and discounts included.
-
By default, the Discount Status is Active, so you can use it in product pricing and orders.
-
Click Save Discount.
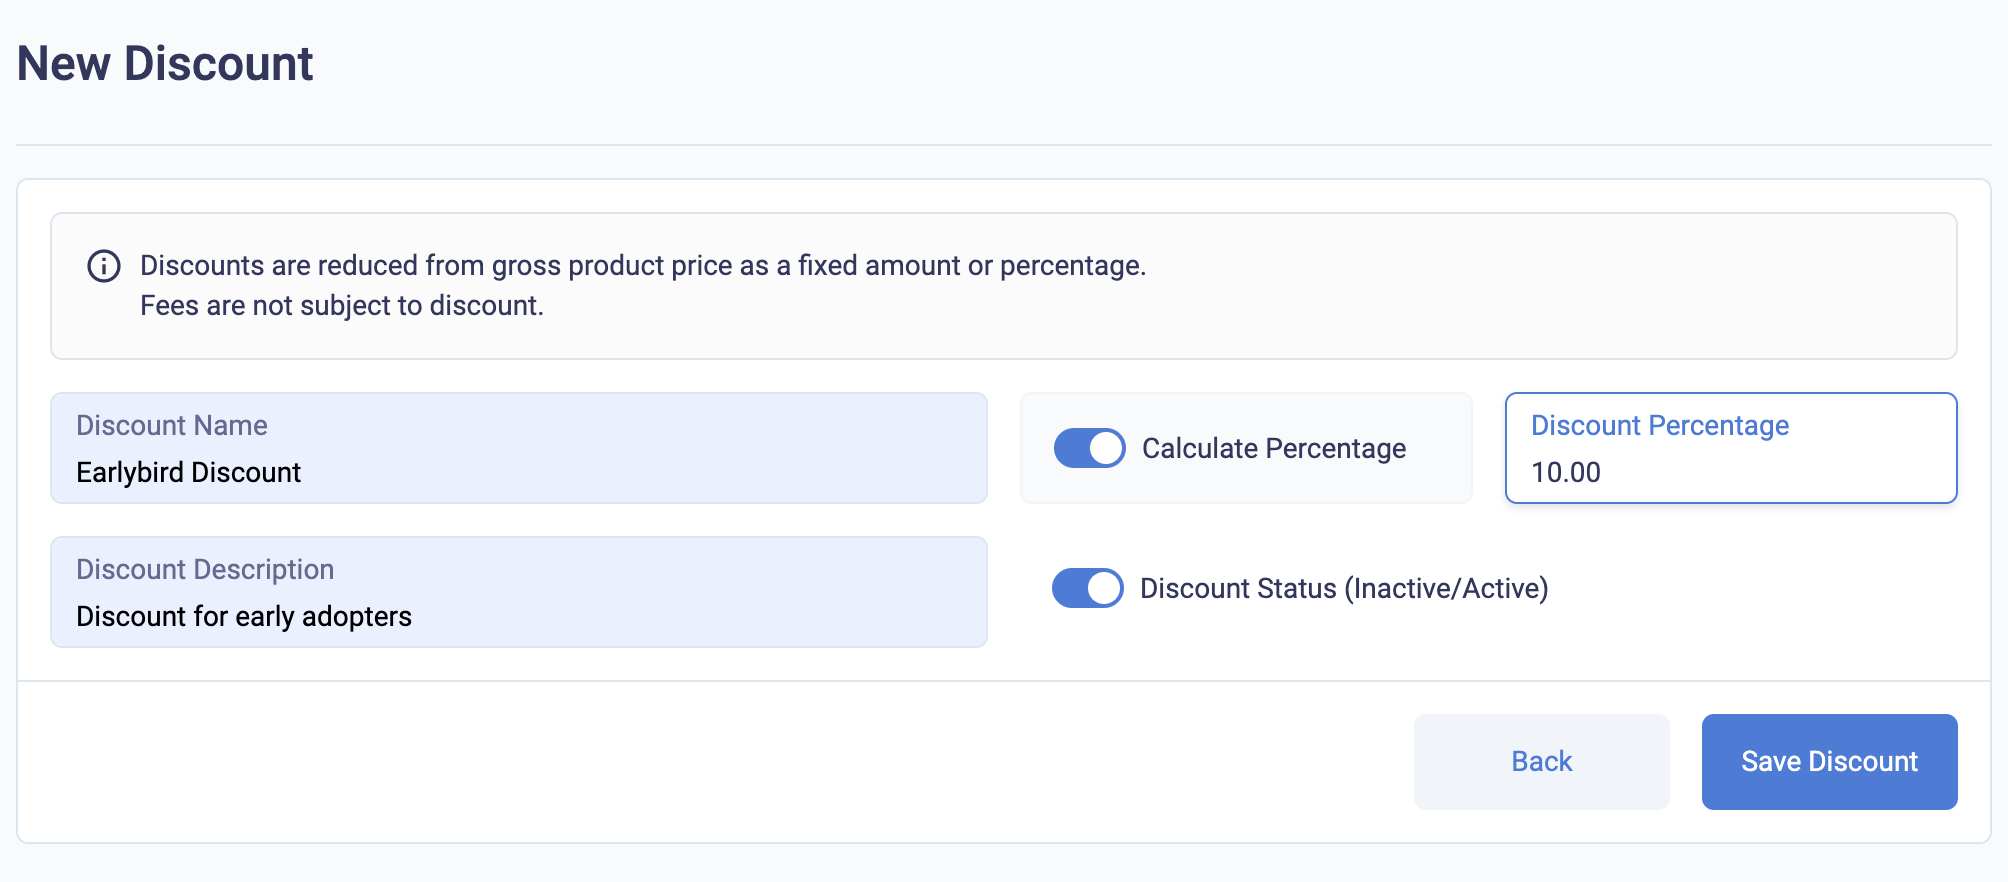
Create a discount
BillPro creates the discount and you can now select the discount in products and orders.
From the control buttons in the Discounts list, you can display and edit discounts. In the Discounts list, active discounts display with a green flag, and inactive discounts display with a grey flag. You cannot delete a discount if it has been used in an order. See Maintain your product catalogue.
Create fees
To create a fee, do the following steps.
-
In the navigation bar, go to Products > Fees.
-
In the Fees list, click (+).
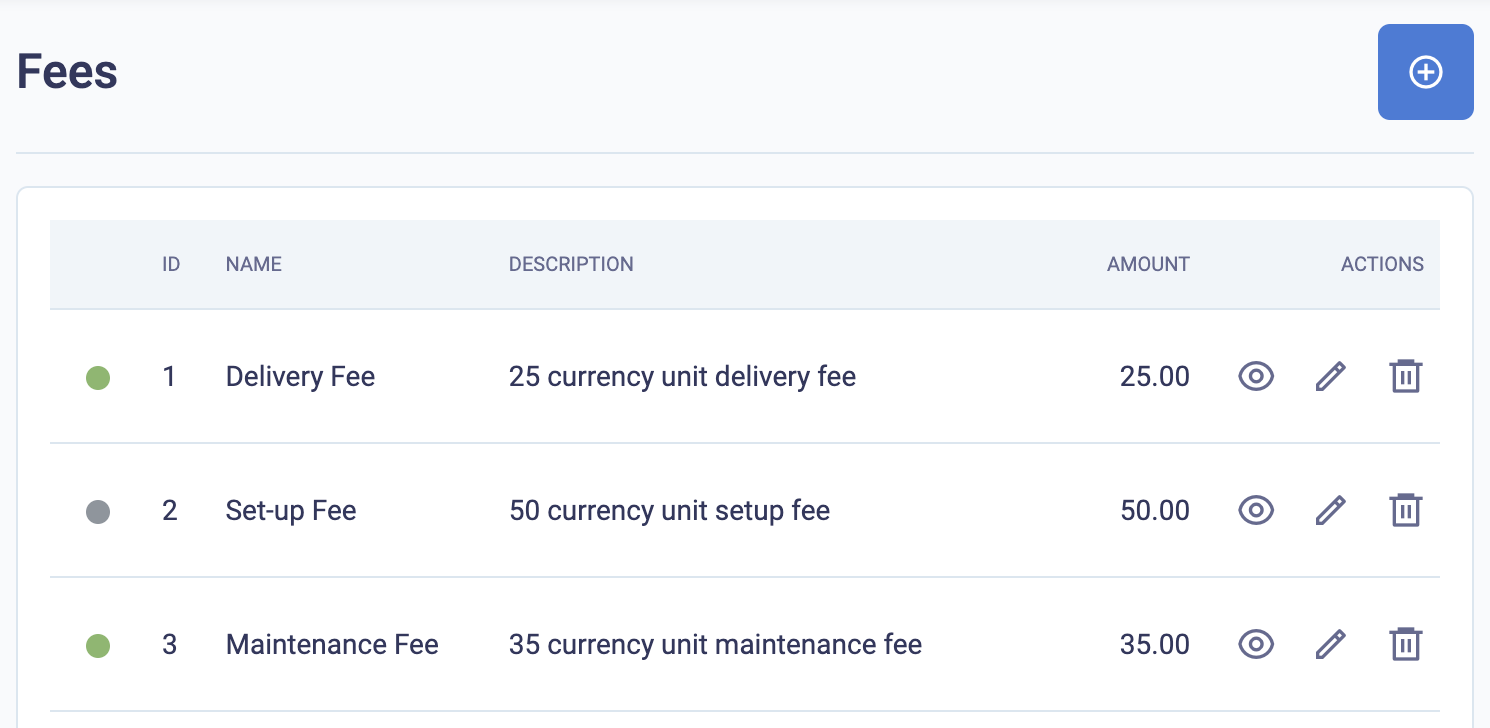
The fees list
-
Enter the Fee or Surcharge name to display for the customer at checkout.
-
Enter the Fee amount, which will be in the same currency as the product or order pricing.
-
You can enter a Description to display at customer checkout.
-
By default, the Fee Status is Active, so you can use it in product pricing and orders.
-
Click Save Fee.
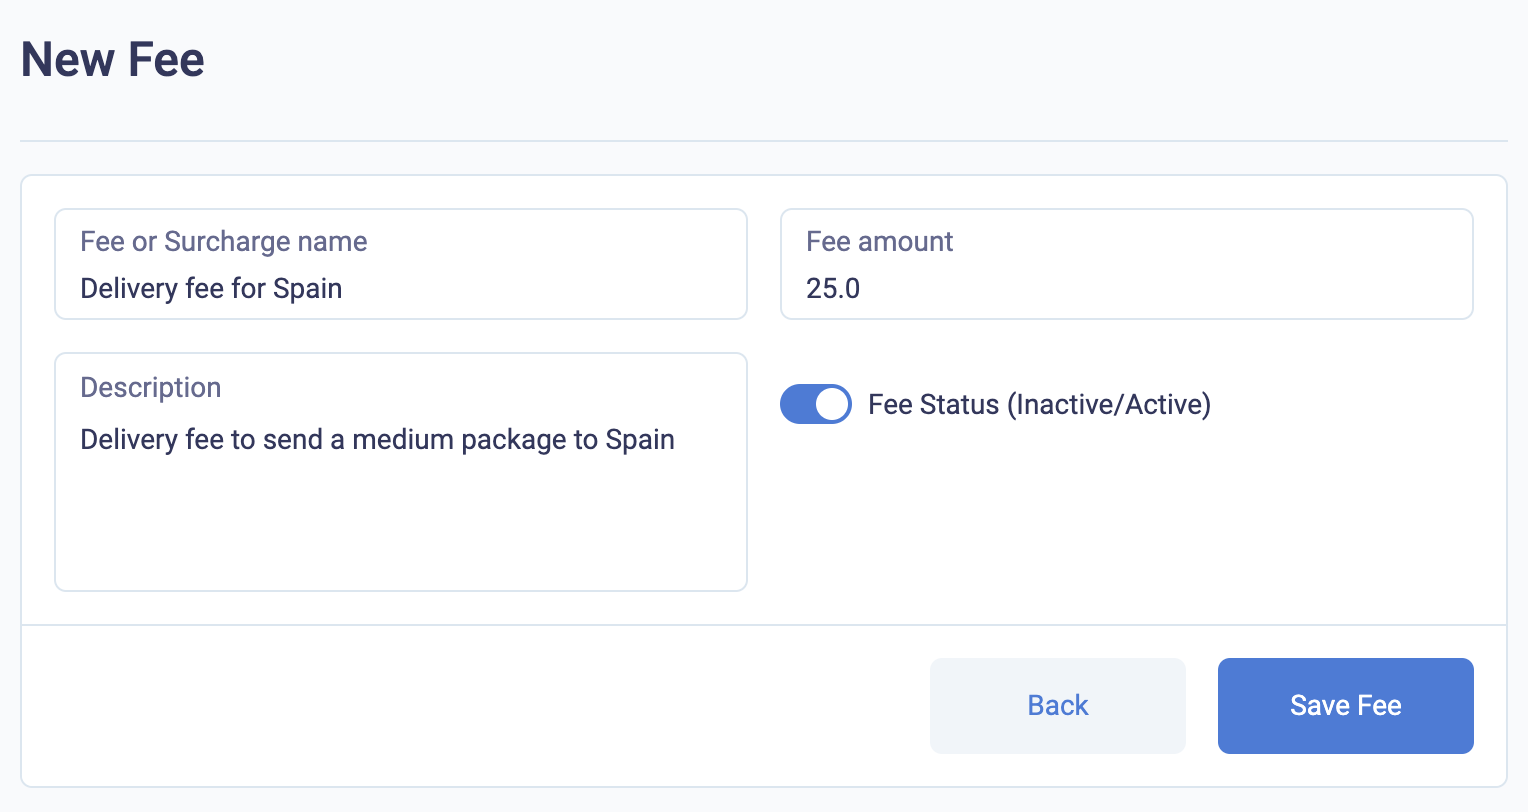
Create a fee
BillPro creates your fee, and now you can select it for product pricing and orders.
From the control buttons in the Fees list, you can display and edit fees. In the Fees list, active fees display with a green flag, and inactive fees display with a grey flag. You cannot delete a fee if it has been used in an order. See Maintain your product catalogue.
Create taxes
To create a tax, do the following steps.
-
In the navigation bar, go to Products > Taxes.
-
In the Taxes list, click (+).
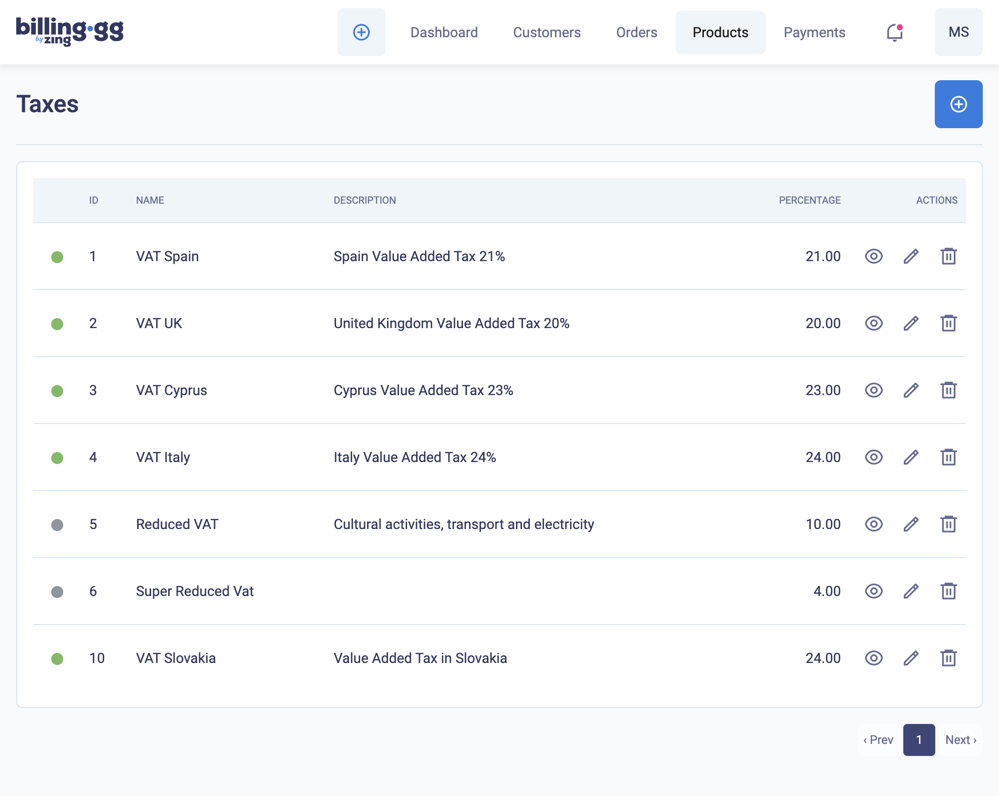
The taxes list
-
Enter the Tax Name to display for the customer at checkout.
-
Enter the Description to help your users identify the tax.
-
Enter the Tax percentage. The platform will display the tax for the customer as part of the product price. The tax does not apply to fees.
-
By default, the Tax Status is Active, so you can use it in product pricing and orders.
-
Click Save Tax.
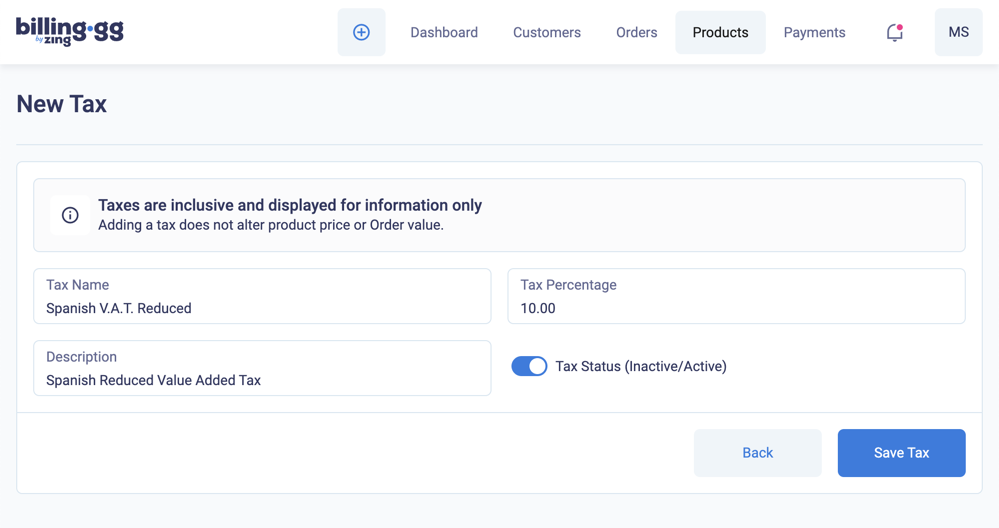
Create a tax
BillPro creates the tax, and now you can select it for product pricing and orders.
In the Taxes section, active taxes display a green flag, and inactive taxes display a grey flag.
From the Taxes list, you can use the ACTIONS buttons to view, edit, and delete taxes. You cannot delete a tax if it has been used in an order, but you can deactivate it. See Maintain your product catalogue
Updated 5 months ago
Create your products!