Manage scheduled payments
Learn how to manage billing events to change the payment schedule
In BillPro, each scheduled payment for a recurring payment order has a billing event. A billing event includes all the actions to collect or cancel a recurring payment. With this tutorial, you can learn how to manage billing events for scheduled payments.
You will need an active instalment or subscription order. You can create one of these with the previous tutorials: Split payments on an order for instalments, and Create a subscription.
- For an instalment order, you can reschedule a billing event, skip a billing event, and merge multiple billing events.
- For a subscription order, you can reschedule or skip a billing event.
Reschedule a billing event
To reschedule a billing event so that you can change the date and/or the amount to pay, do these steps.
- In the navigation bar, go to Orders and open the Orders list.
- You can search for your order by the customer name or the order ID. To open the Order Summary for your order, click on the order ID or the CUSTOMER.
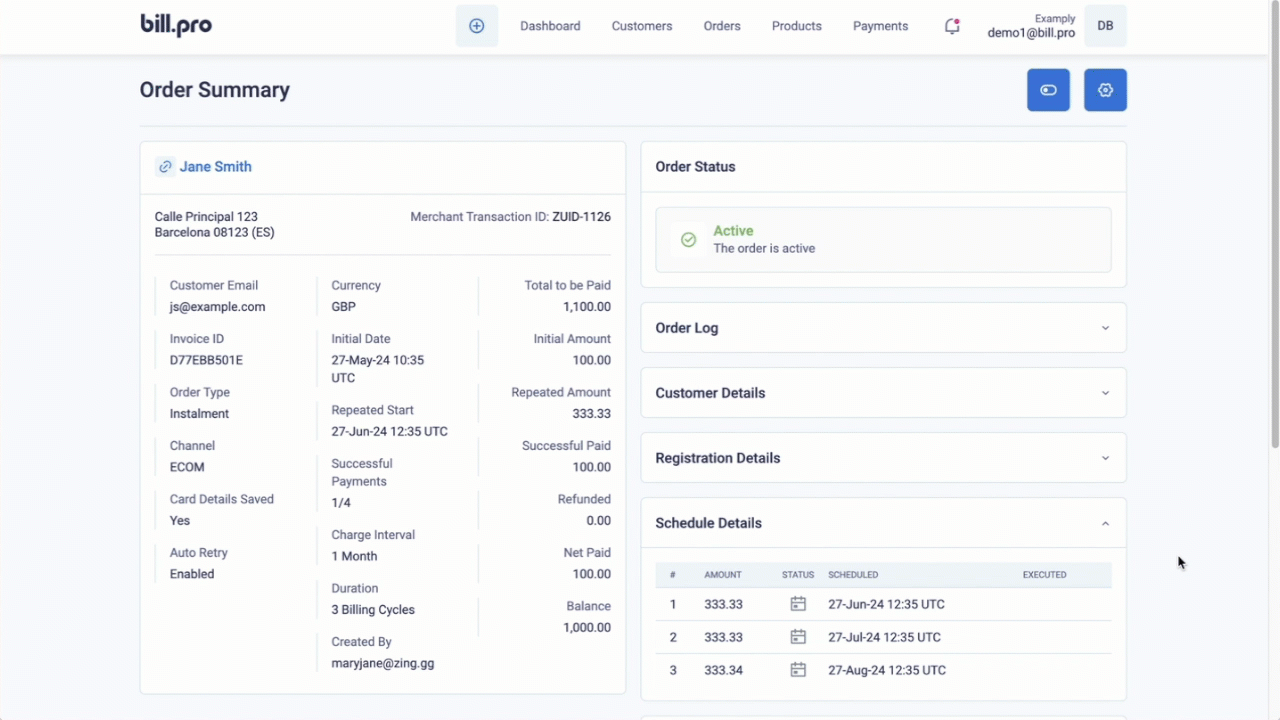
- In the Order Summary go to the top right of the page and from the gear button actions menu, go to Payments. The Scheduled Payments pop-up opens.
- Look for a billing event that has a status of
scheduled(calendar icon) orsoft-declined(red ⚠️ warning icon). For more details, see Billing event status. - Select the billing event, and click Reschedule.
- The billing events are scheduled for UTC time. But for the Date, BillPro loads the current date and local time. Optionally, select the new date and date time to collect the billing event. Convert your local time to UTC time.
- Optionally, change the Amount.
- Click Submit.
- Confirm the change.
BillPro reschedules the billing event and displays it in the Scheduled Payments list. The billing event now has a status of scheduled.
Skip a billing event
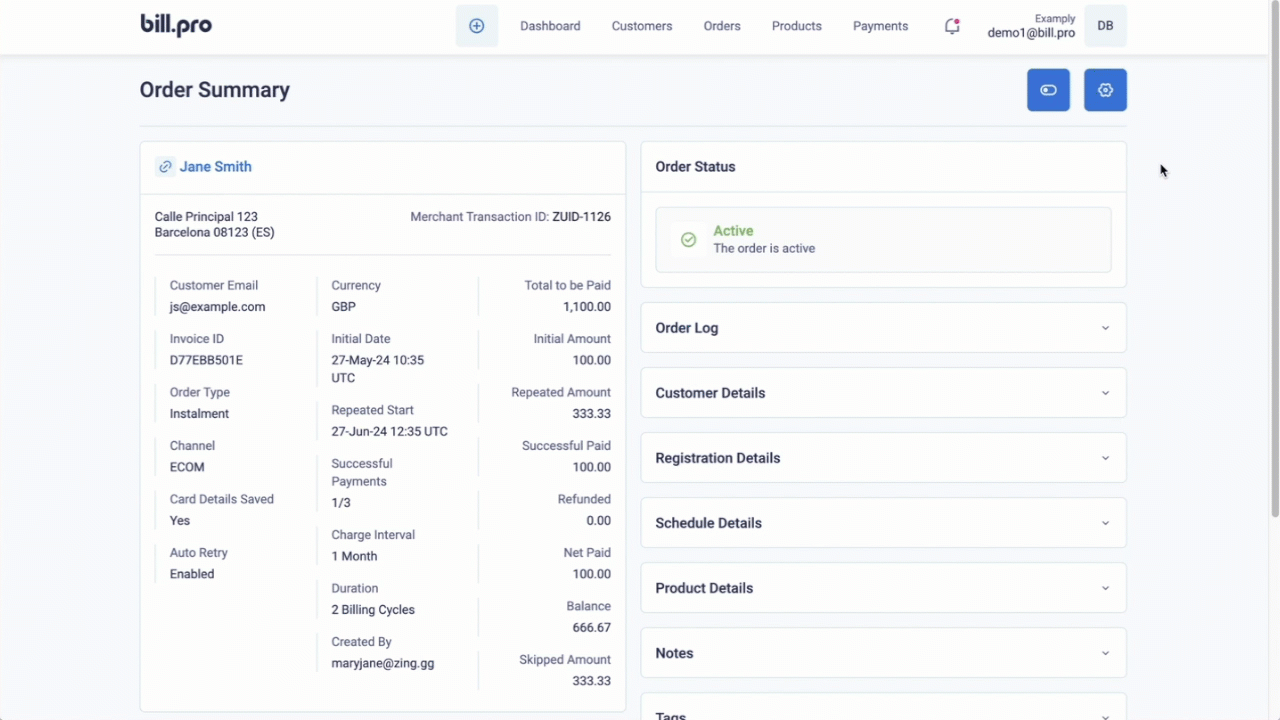
To cancel a payment, you can skip a billing event. If you skip the billing event, you do not collect it.
To skip a billing event, do these steps.
- In the navigation bar, go to Orders and open the Orders list.
- You can search for your order by the customer name or order ID. To open the Order Summary for your order, click on the order ID or the CUSTOMER.
- In the Order Summary, go to the top right of the page, and from the gear button actions menu, go to Payments. The Scheduled Payments pop-up opens.
- Look for a billing event that has a status of
scheduled(calendar icon) orsoft-declinedorhard-declined(red icons). For more details, see Billing event status. - In the Scheduled Payments pop-up, select the scheduled or declined billing event.
- Click Skip to cancel this billing event.
- Confirm that you wish to cancel the billing event. You cannot collect the skipped payment.
The skipped billing event is displayed in the Scheduled Payments list. It has the fast-forward skipped symbol, which is a double arrow. For an instalment order, BillPro removes the skipped amount from the order balance.
Merge billing events
Instalment and metered orders can have multiple billing events. If you wish to create a single payment from multiple payments, you can merge them. At the same time, you can also reschedule and change the amount. To merge billing events, follow these steps.
- In the Scheduled Payments pop-up, select multiple billing events with a status of
scheduledorsoft-declined. - Click Merge.
- The billing events are scheduled for UTC time. But for the Date, BillPro loads the current date and local time. Select the new date and date time to collect the billing event. The default date and time is that of the last scheduled billing event. Remember to convert your local time to UTC time.
- (Optional) For the Amount, BillPro displays the total of the merged billing events. You can change the Amount.
- Click Submit.
- Confirm the change.
In the Scheduled Payments list, BillPro displays the merged billing events with the "joint" merged symbol. BillPro also creates a new scheduled billing event for the new amount.
After you reschedule, skip, or merge billing events, BillPro always sends an email notification. Each notification contains a payment link that the customer can use to open the order portal. Here, the customer can view their order details and billing history. And they can manage their cards, and download invoices, receipts, and credit notes.